Carbon MTB rims, are they for you?

MTB rims
IMG_20160330_163047

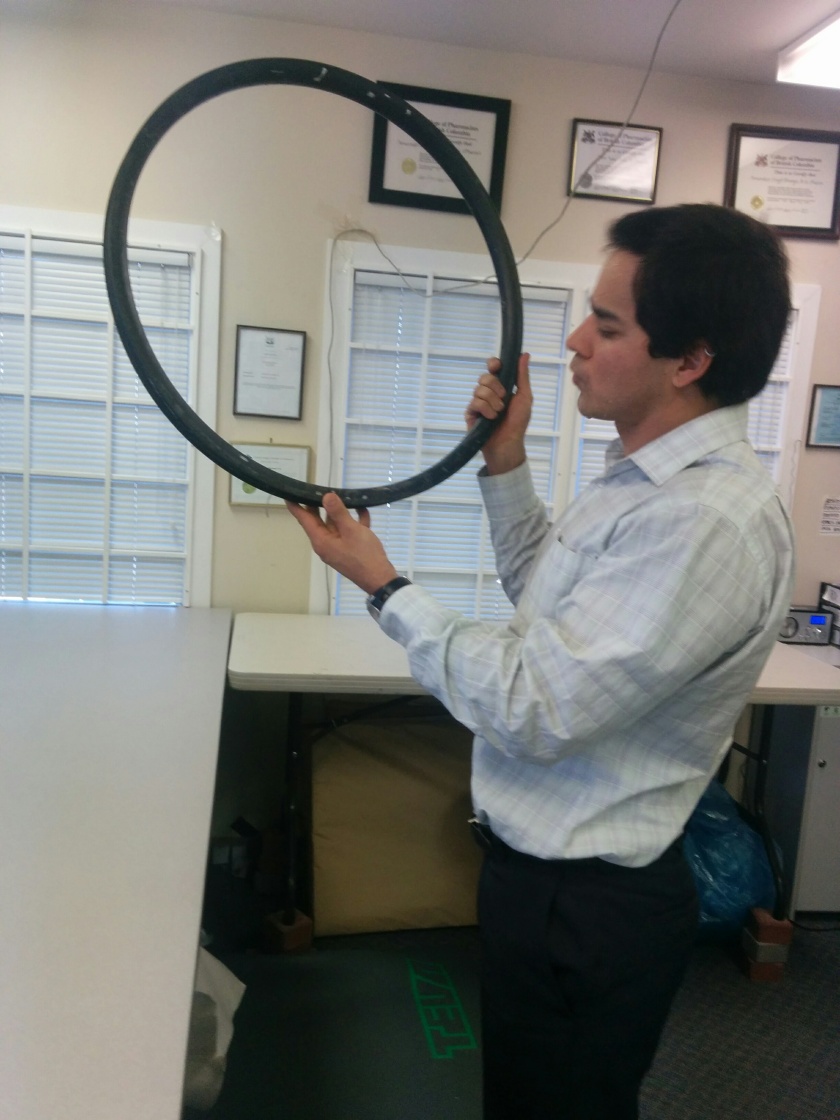
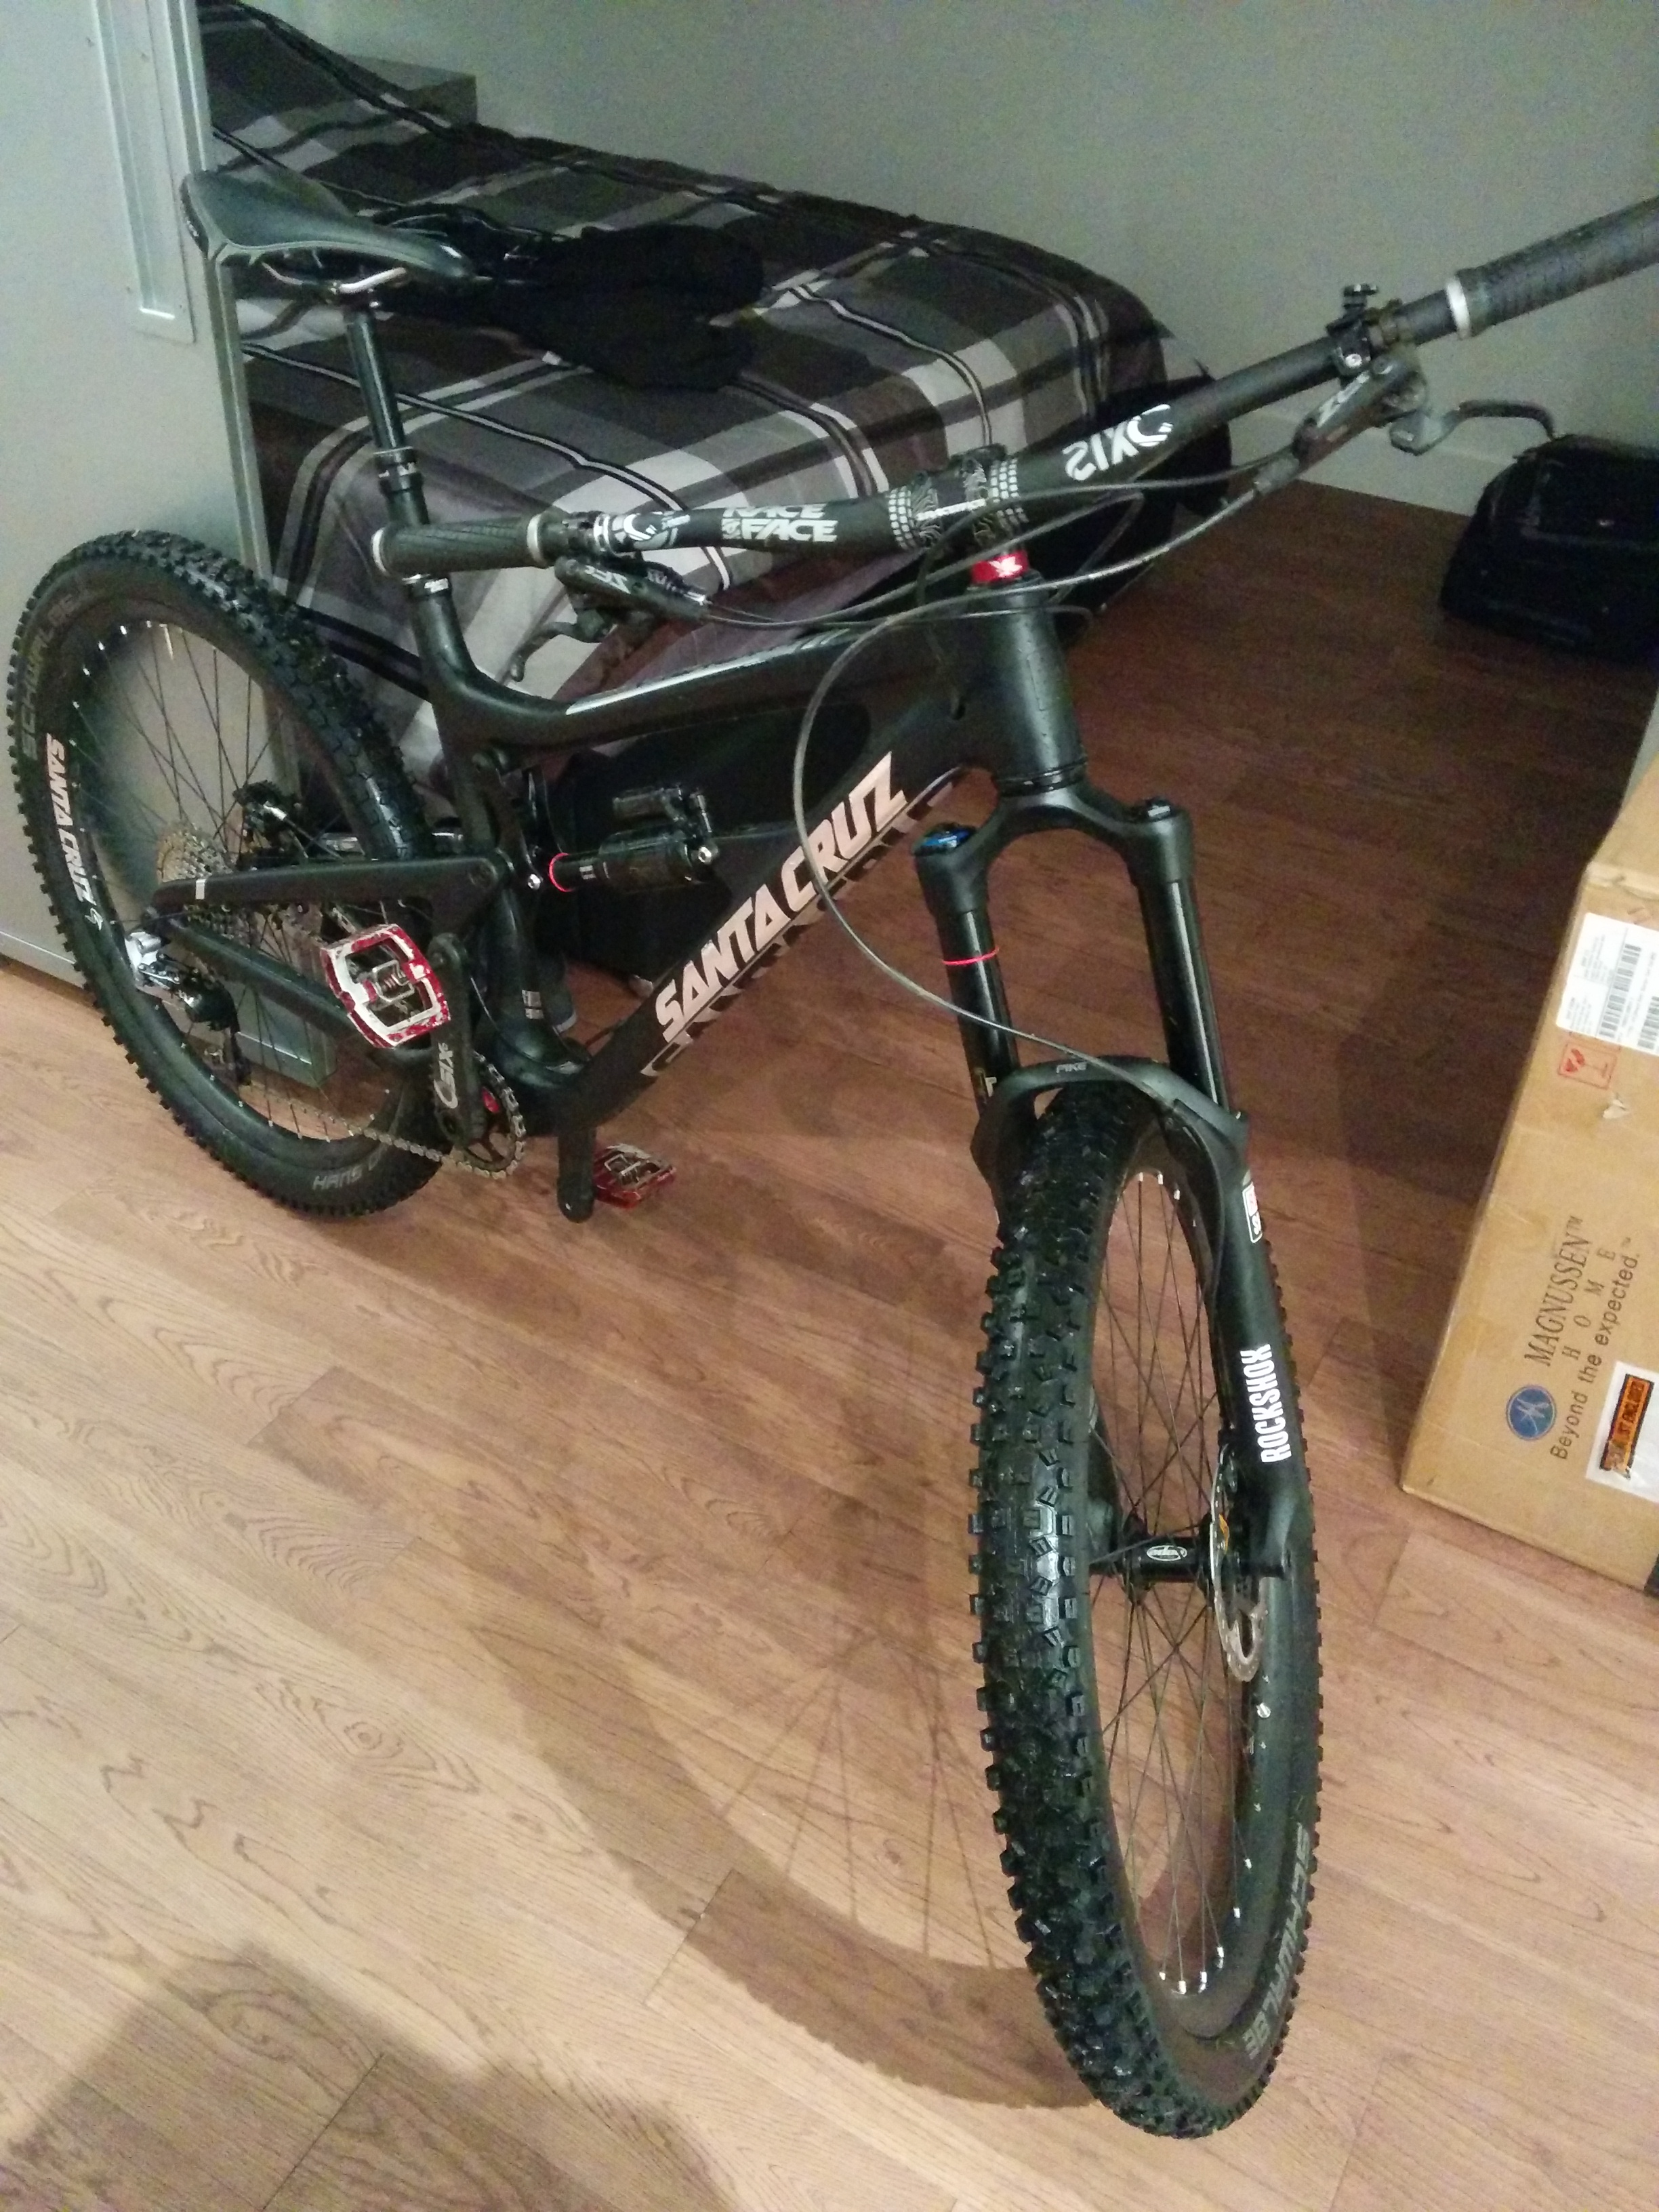
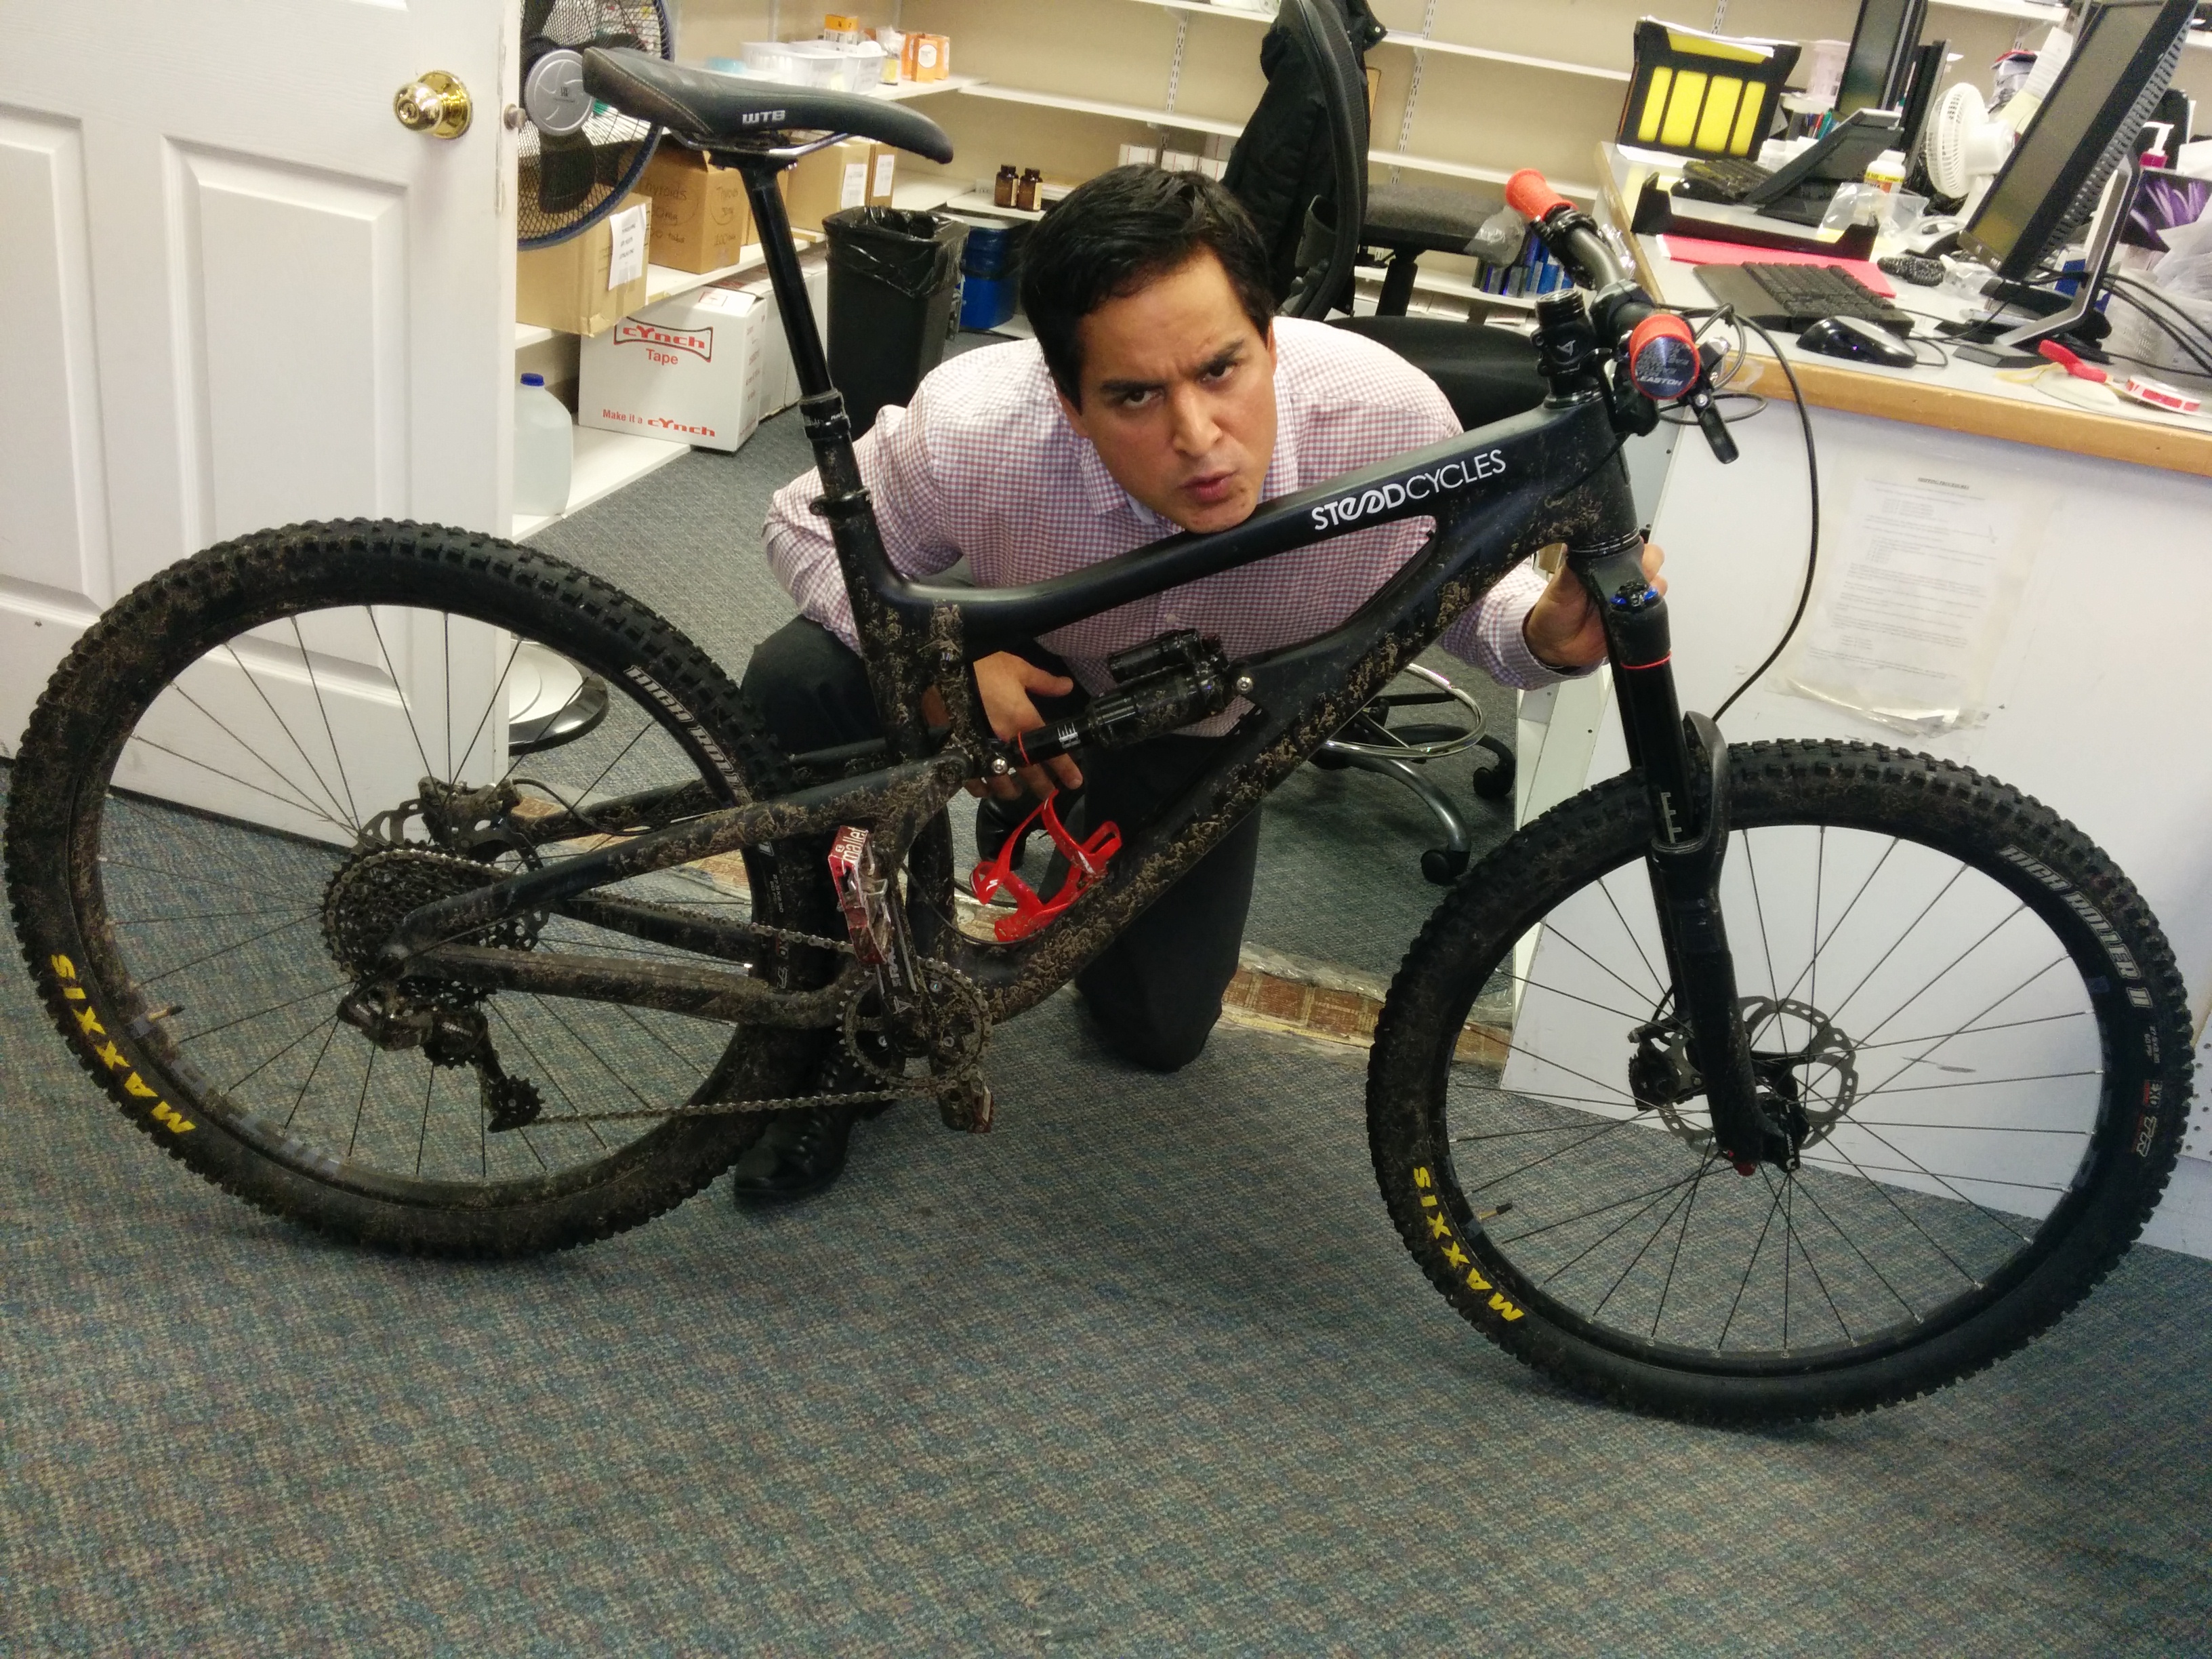
The author closely examining a Carbon rim from Light Bicycle.

 
MOCHILINHA

Eu dedico esse artigo pros mochilinhas no Brasil que sabem de tudo menos pedalar.


In this review, I will give my opinion about the advantages and disadvantages of carbon rims based on my experiences riding with both alloy and carbon rims for the past year.  I don’t want to get into too many technical details regarding force impact testing, setup, etc.   I wish to convey the advantages and disadvantages of each type of wheelset in laymans terms to help the consumer make a more informed decision.


Most people assume that spending more money on bike parts will make you a better rider and will leave the bike feeling more comfortable. I rode for 1 year with a Carbon wheelset, switched to an alloy wheelset for 2 weeks and then back to the Carbon wheelset.  Below I will outline what I liked/disliked about each wheelset as well as the advantages and disadvantages of each wheelset.  During this testing period, I rode the Light Bicycle HD rims hard for 1 year. I rode them mainly on the North Shore along with the Whistler Valley enduro trails consistently at least 2-3 times per week. If I had to place an exact number, I would say I climbed and descended at least 2000-3000 meters per week each week for the whole year.  I rode in all conditions ranging from dusty and dry to snowy and wet.  I would describe myself as an intermediate rider who is slowly progressing to an advanced level. During this year, I rode mainly technical rooty and rocky terrain and subject the Carbon rims to various cased jumps due to error and intentionally with the Alloy wheelset to get a feeling for the differences between each wheelset.

My Experiences

Alloy (Stan’s ZTR Flow)

IMG_20160330_162342

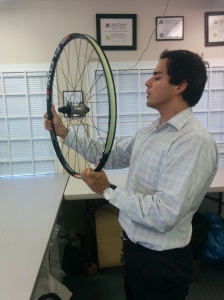
The author closely examining his Alloy Stan’s rim with I9 hub.

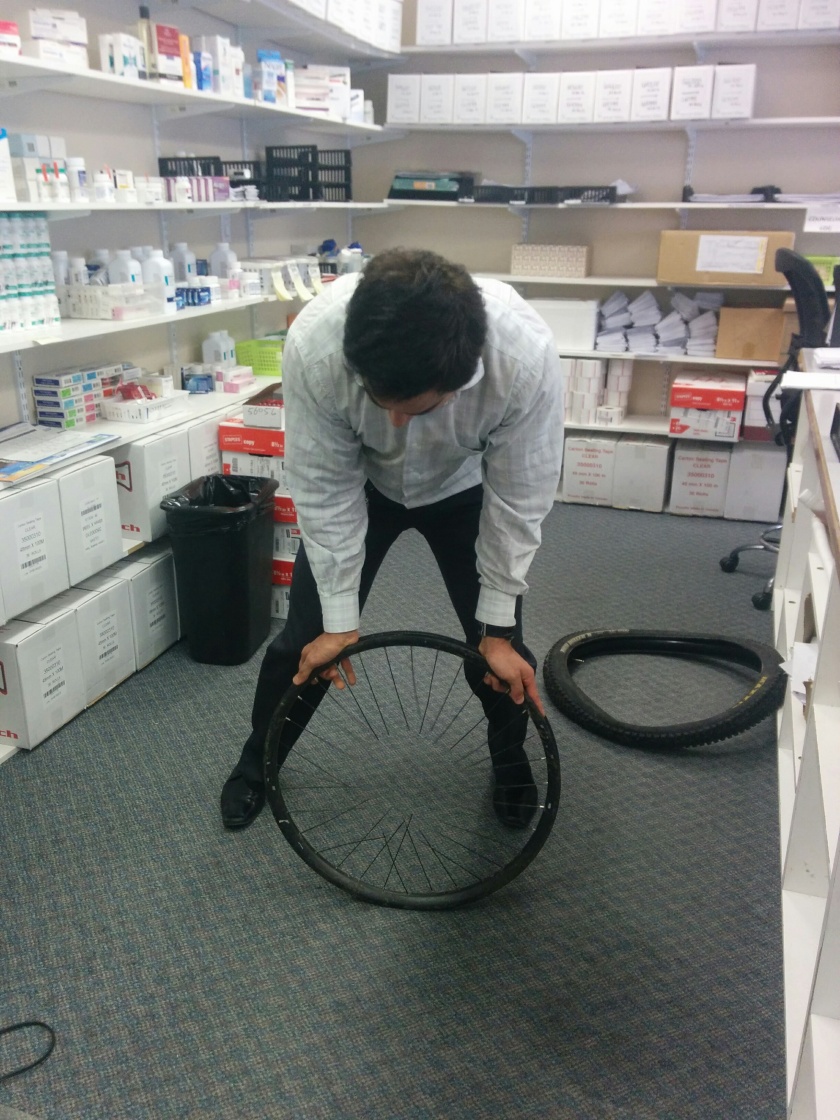
After riding solely with a Light Bicycle wheelset for over 1 year, I swapped back to an alloy Stan’s wheelset.  Upon climbing, I noticed the change immediately.  I was more sluggish and I didn’t feel optimal power transfer like I would have with the Carbon Wheelset.  However, upon the descent I was pleasantly surprised.  Descending on the Alloy wheelset felt like I was on a recently tuned suspension.  It felt extremely comfortable and soft and I was getting good feedback from the terrain. The flex caused by the rider weight and speed essentially leaves a larger amount of the rims footprint for aluminum rims. This transfers to a softer ride as well as more braking. The carbon rim on the other hand, even if you get the wheelbuilder to build it a bit softer, still leaves for a stiff feeling rim that won’t contort to the ground like aluminum rims. To observe this, you can press down with about 1/3rd or 1/4 of your body weight on both types of rims without the attached hubs or spokes. You’ll quickly observe the stiffness of the carbon rim and the flex permitted by the aluminum rims.  I would best describe the Aluminum rim ride as a soft plush comfortable ride.  Even when I cased some jumps intentionally, I never got that stiff thud that I would have gotten when I had mistakenly cased jumps with my Carbon wheelset.

Carbon (Light Bicycle)

The first thing I noticed when I went back to the Carbon rims after testing the Alloy rims was the speed that this wheelset was able to carry.  On my descents, I noticed I was rolling a lot faster.  Initially, I thought that I had pumped my tire pressure up a lot higher and was able to maintain a higher rolling speed.  The stiffness of the wheelset also has a slight downside, its not as comfortable and plush a feeling as you get with the alloy wheelset.  It will definitely take some getting use to especially the first couple times that you ride.  The stiffness of the rim (not allowing any flex) is transferred directly to your body and initially it feels like you’ve been jolted around after a ride.  However, this stiffness has 1 big advantage and that is acceleration.  On my descents often after railing a berm and entering a pedal section of the trail, I can add a couple of powerful pedal strokes that continues my speed after the braking into the berm.  A couple of my riding friends did mention to me that I was riding faster after they seen me on the Carbon rims.

IMG_20160330_162155

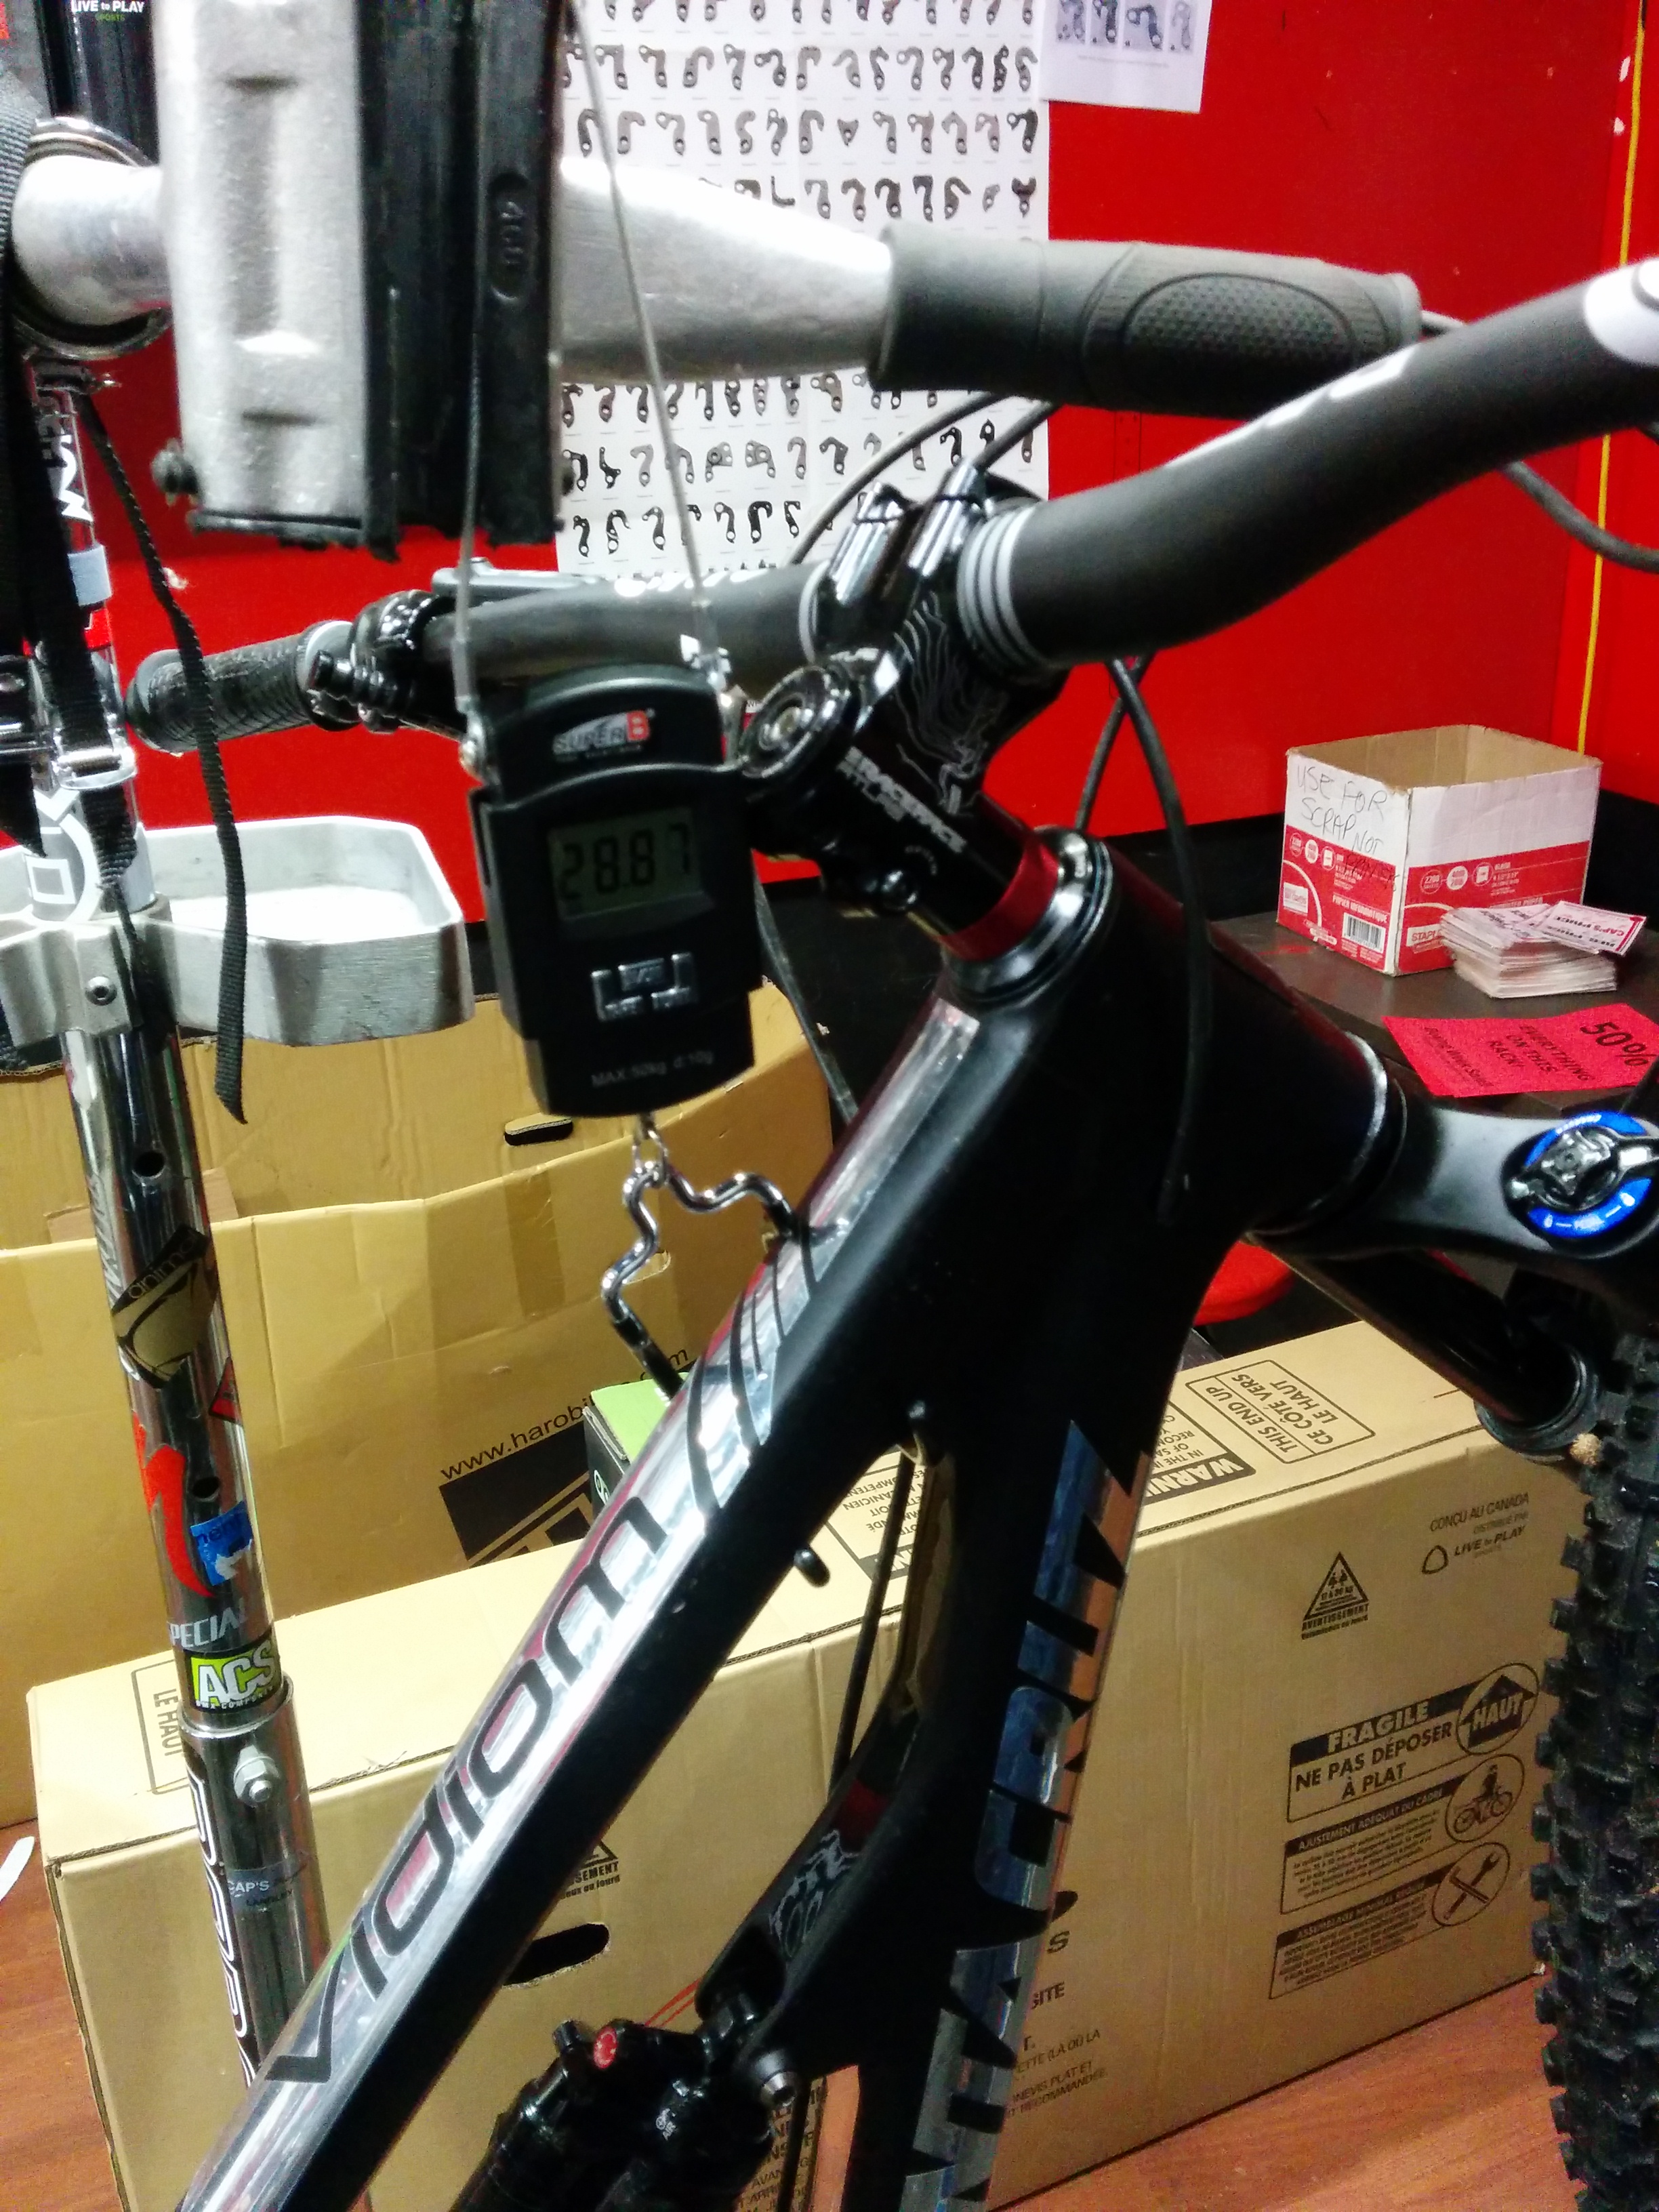
The biggest advantage of Carbon rims is Stiffness and not weight.  Here, the author is pressing down with about 50% of his body weight and no flex is observed.

 Climbing on each rim

Can carbon rims help you climb faster?  This was the big question for me as most of my riding is done on the North Shore and Whistler on the mainly Enduro type trails, in other words a long sweaty climb up for a thrilling enjoyable descent (time is split 75-80% climb followed by 20-25% descent).  Any help in terms of climbing efficiency would be greatly appreciated. When changing from the Carbon rim to the Stan’s ZTR Flow aluminum rim, I noticed a loss of climbing efficiency.  I really discovered this when I switched back to the Carbon wheelset after 2 weeks.  I observed a much better power transfer with the Carbon rims even on gravel road climbs.  With the added stiffness of the Carbon rim, I was using an efficient smooth pedal stroke during the entire climb.  I felt that I was using the upstroke during pedaling as much as the downstroke and this transferred to a smooth climb each time.  I wasn’t sluggish and burning out like I was the previous couple of weeks on the Alloy wheelset. On XC type trails (ex. Bridle Path), there is also an advantage with Carbon rims. There are periods of time during XC riding you will require an immediate acceleration to get over a rocky or rooty technical section. The carbon rims offer the acceleration advantage of optimal power transfer due to the stiffness of the rims that will help in your XC climbs and riding.  If I had to place a number on it, I will say that the carbon rims add about 18.5% to my climbing efficiency.

Breaking of Rims

I feel that with enough time and if there is enough impact to the rims (example. Rock strikes, casing big hits), the Carbon rims will crack. Now, due to the inherent nature of Carbon rim design, if faced with enough force, the rim will be unable to hold itself together and the result will be a crack in the rim. Aluminum rims are much more forgiving and will absorb impacts and rider errors. In my opinion, Carbon rims will be a much better fit for the more experienced, more graceful rider and in particular the rider that is light on the bike. The newer or intermediate rider along with the charging aggressive type rider will suffer from not only lack of comfort during riding but also potentially breaking these rims due to bad line choices and staying heavy on the bike.  There is 1 thing that will help prevent breaking of Carbon rims and that is tire pressure.  I consistently monitored my tire pressure before each ride (28-32psi rear, 26-30psi front based on terrain) to ensure that I wasn’t riding with a low inflated tire.  The lower the pressure, the higher the chance that the rim can make contact with a rock and potentially break.  If I was mainly a shuttle rider and/or a bike park rider, the Carbon rims would offer little benefit to me besides acceleration and the potential to crack the rim would outweigh the added benefits.

broken enve

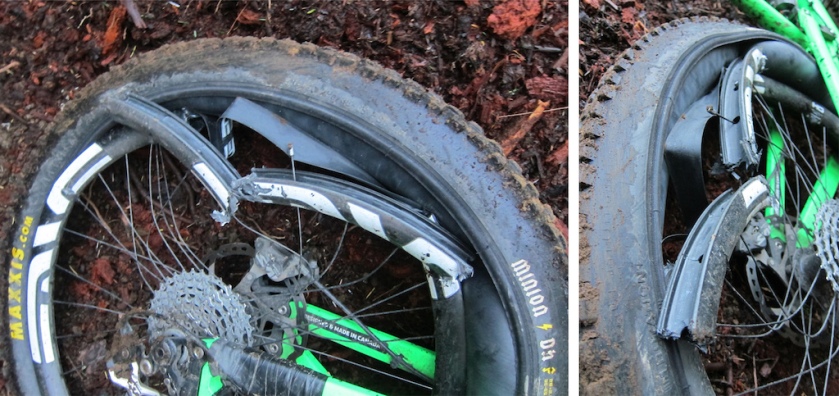
An example of a broken Carbon rim.

Finally, I just want to bring up one point. We must always remember that the MTB industry like any other industry is subject to marketing campaigns in order to sell their products. Companies like ENVE wheels cater to the higher end MTB client much like a Mercedes Benz or BMW car.  You are paying a lot more for the quality of a product.

I believe ENVE wheels has much more rigorous quality control in particular with their carbon layout process. I believe that they will inspect in detail the following.  Are the walls a consistent thickness? are there any hollow spots…etc?  There are also some technical details involving lateral and torsional stiffness of the rims with claims that ENVE wheels are the stiffest on the market leading to the greatest power transfer.  Other technical details involve a patent for molded spokes and valve holes.  All this translates into a higher quality product with the added cost going to the end consumer.  I can’t comment on my experience with ENVE wheels as I’ve never used them but if anyone at ENVE is reading this, feel free to send me a set of your $3000 wheels and I will write a very nice biased review of your luxurious product.  (More details about ENVE Carbon rim specifications http://enve.com/why-enve/).
I’ve spoken with expert mechanics on the North Shore to ask if they observed any difference in breaks amongst different Carbon Rims.  They all replied the same thing, they have seen cracks in all brands of Carbon rims and there is no difference amongst the types of cracks, quantity of cracks and/or frequency of broken rims.  I just want to repeat that that is the opinion of professionals in the field and not based on my own experience with different Carbon rims.


And did I crack my Carbon rims?  Of course, I did (see image below). I rode consistently similar terrain for 1 year and I was sure that that my Carbon rims were bombproof until 1 day on Cypress when I heard a loud crack going over a loose rock. I had initially assumed I had burped the tire but on closer inspection, there was a big crack right through the entire rim. This was unexpected as I wasn’t going particularly fast and I had monitored my tire pressure before riding.  Saying this, would I buy Carbon rims again?  Definitely.  The advantages offered by Carbon rims for my type of riding benefit me greatly.  Will they break again?  Probably. From my riding experiences, I’ve discovered that there are only 2 certainties in mountain biking.  The first being that your dropper post will fail and the second that your carbon rims will crack.

On a side note, there are mechanics in the Lower Mainland that have the skills to rebuild a broken carbon rim for a fraction of the cost of a new rim.  If you live in the Lower Mainland and require a contact to rebuild a Carbon rim, feel free to message me.


The broken rim (left) and 2 images of the repaired rim.

Special thanks: Brock Fisher, helping with editing and revision.

20140128_1701561

Special Thanks to Jordan, Chaz and all the staff at Cove bikes for the wheelbuild and service.


For additional articles/reviews by this author, click on the following:

Santa Cruz Carbon bicycles:

https://thebikingbuddah.wordpress.com/2014/10/16/he-carbon-craze/

Devinci Spartan test ride:

https://thebikingbuddah.wordpress.com/2014/10/20/devinci-spartan-test-ride-enduro-craze/

Night riding (lumens):

https://thebikingbuddah.wordpress.com/2014/10/30/night-riding-how-many-lumens-do-you-really-need-testing-1500-versus-3000-lumens/

Sugoi RSX Neoshell rain jacket:

https://thebikingbuddah.wordpress.com/2014/11/26/sugoi-rsx-neoshell-jacket-windcoldrain/

Santa Cruz Nomad – my custom build:

https://thebikingbuddah.wordpress.com/2015/01/08/2015-santa-cruz-nomad-custom-build-first-look/

Santa Cruz Nomad – 3 month review:

https://thebikingbuddah.wordpress.com/2015/03/17/2015-custom-santa-cruz-nomad-3-month-review/

Spring and Summer TLD riding gear:

https://thebikingbuddah.wordpress.com/2015/04/29/spring-and-summer-tld-riding-gear/

If you still want more, click below to see my Video home page:

https://vimeo.com/user24675081

Spring and Summer TLD riding gear

Spring and summer MTB clothing.

With Spring well underway in the Pacific Northwest, I wish to share a quick review of 2 articles of TLD clothing that I have become particularly fond of during my Spring all mountain riding on the North Shore of British Columbia.  My preferred riding gear for most days include TLD Ruckus shorts and the TLD Ace jersey. IMG_20150414_160425 IMG_20150414_160436 While deciding from the various options of riding gear available.  I was looking at 3 main factors.  Foremost, I wanted to ride without my Camelbak as I believe that I ride better with more space to maneuver my upper body without a backpack attached.  The other factors I considered were storage space and breathability.  With the combination of the TLD Ruckus shorts and Ace Jersey, I believe that I’ve found the perfect set of riding gear.  I will review both the shorts and the jersey independently below.

TLD RUCKUS SHORTS

IMG_20150415_124236

Zipped hidden inseam pockets allow for increased ventilation.

IMG_20150415_124349

Deep pockets allow for storage while remaining pedal friendly.

Composed of 92% polyester and 8% spandex, I found the shorts to be highly breathable.  As an added benefit, inseam zippers are included to allow for increased ventilation.  I use Size 34 TLD Moto shorts as my DH shorts and have found that size 34 Ruckus shorts fit me just fine, they are neither excessively baggy nor tightly fitted XC race style.  I guess you can describe them as midway between the TLD Moto shorts and roadie style spandex, they are neither too tight or too loose and they weigh considerably less than the Moto shorts but not as light as fitted XC spandex.  Outsourced for manufacture in China, essentially with these shorts you are paying for the details and not the cost of the material.  In terms of details there is no shortage.  There are 3 zipped pockets, 1 on the front side around the hip, 1 on the front right pocket and 1 in the rear.  I never found any shortage of space for storing my cell phone, keys, energy bars, and even sunglasses in the zipped rear pocket.  The pockets are deep but remain pedal friendly with the contents inside the pockets not moving around even through many rocky and rooty technical descents.  On more than 1 occasion, I had stored my keys unzipped in the right front pocket and they remained there until the end of my ride.  Another important detail is the addition of a plastic coated Velcro hip/waist adjustment where you can adjust on both sides the tightness of the shorts.  Being a heavy sweater, I’ve found this to be an added benefit as I will lose quite bit of water weight due to sweating and will need to make the shorts a bit tighter as I progress into my ride.  Another welcome detail about these shorts is the addition of  a chamois liner that is easily detached from  the shorts.  Its a standard snug tight fitting chamois that can be used on longer epic all day rides.  I haven’t used it enough to say whether it is comfortable or not but comparing it to my road cycling shorts, the chamois is of equal thickness and so I assume it will be comfortable on epic all day rides.

IMG_20150416_221543

Made in China (of course, isn’t everything). I use size 34 TLD Moto shorts and size 34 Ruckus shorts fit me perfectly.

TLD Ace Jersey

IMG_20150414_161236 IMG_20150414_161155

IMG_20150415_124205

As an added feature, TLD includes a lens cleaning cloth on the inside of the jersey. This came in handy to wipe the sweat off of my sunglasses during my climbs.

IMG_20150414_160440

The Ace jersey retains a comfortable fit even when your upper body is fully flexed. As a rule of thumb, this is a good way to determine whether or not the jersey is too tight.

The Ace jersey is marketed mainly as an XC jersey for XC riders but the attractive features of the jersey also lend it to use for all mountain riding.  It is a somewhat snug fitting jersey and so a size larger may be a good option.  I use an XL TLD sprint jersey which hangs somewhat loose without armor and find that the XL Ace jersey fits me perfectly.  It is neither too tight or too loose even when I am fully flexing my upper body (this is a good way to determine how comfortable the jersey will be).  The biggest advantage of this jersey apart from the lightweight breathable polyester fabric is the storage space of the 3 rear pockets along with the 1 zip rear pocket. The pockets run deep and are well stitched to accommodate lots of riding accessories.  As seen from the above photos, I never had a problem carrying an extra water bottle, shock pump, GoPro tripod and camera as well as tools.  There is adequate space to have a CO2 pump along with a spare tube and tire levers as well.  The pockets run deep and I never had any problems with things falling out despite riding in very technical North Shore terrain.  Once again, with TLD, you are paying for the details.  There is a sunglass cleaning cloth on the inside of the jersey and I have taken advantage of it to wipe my sunglass lenses of dripping sweat from my eyebrows during my climbs.  The one thing to keep in mind is that this isn’t a 3/4 arm length jersey and you may end up with scratched elbows from crashes as the lower part of your arms below the elbows aren’t covered by fabric.  I believe that this is the only downside of this jersey.  Saying that, keep in mind that it is marketed for XC use.

IMG_20150416_180513

Not a 3/4 arm length jersey may lead to some scratching on your elbows from crashes.  Thanks to the Irishman at the top of Seventh on Fromme for taking this photo.

The costs right now according to chainreactioncycles.com for the Ace jersey are $86 and for the Ruckus shorts $146 (Canadian dollars, universal MTB currency) respectively.  The price seems a bit steep, especially considering these articles are manufactured in China using cheap sweatshop labour and a relativeley low cost for materials.  You want to argue over the cost, go ahead, but keep in mind that the tablet, phone, or laptop your using right now to read this blog was probably manufactured in similar conditions in China or another Asian country and has a similar exaggerated cost.  If I have to compare TLD gear to a well know established company, I’d compare them to Oakley.  Essentially, what your getting is above average priced gear but quality material that is durable, resistant, and will last.  I own both Oakley products and TLD gear and won’t complain about the quality and durability of any of these products.

Final Thoughts

Finally, I wish everyone a safe and adrenaline filled spring and summer shredding season.  Find the fine balance between progressing your skills and staying safe.  Simply put, when approaching that drop, jump, or gnarly rock roll if you don’t feel 100% confident…don’t attempt it.  Do not be the A-Line hero walking out of Whistler General with an arm sling in the first week of the season!  The only thing worse than recovery time is listening to your non-riding friends trying to tell you that doing yoga will heal you faster?!?  

About the author

IMG_20141106_162832Jas Dhiman (aka. The Biking Buddha) is a pharmacist and mountain biking enthusiast born and raised in Vancouver, BC.  I can usually be spotted shredding on the North Shore mountains where I like to escape from watching my beloved city being overtaken by foreign investment.  I write my reviews pursuing my love of research analysis in a manner similar to research analysis involved with evaluating prescription medications.  If you see me on the trails, say “Hi” and I am more than happy to share a lap with you.

Special Thanks

Vidiom Graphics

Custom MTB decals in all colors.

558654_409179699147683_1175878633_n

http://www.yuhosports.com. Thanks for the bike repairs and quick turnaround time.

For additional articles/reviews by this author, click on the following:

Santa Cruz Carbon bicycles:

https://thebikingbuddah.wordpress.com/2014/10/16/he-carbon-craze/

Devinci Spartan test ride:

https://thebikingbuddah.wordpress.com/2014/10/20/devinci-spartan-test-ride-enduro-craze/

Night riding (lumens):

https://thebikingbuddah.wordpress.com/2014/10/30/night-riding-how-many-lumens-do-you-really-need-testing-1500-versus-3000-lumens/

Sugoi RSX Neoshell rain jacket:

https://thebikingbuddah.wordpress.com/2014/11/26/sugoi-rsx-neoshell-jacket-windcoldrain/

Santa Cruz Nomad – my custom build:

https://thebikingbuddah.wordpress.com/2015/01/08/2015-santa-cruz-nomad-custom-build-first-look/

Santa Cruz Nomad – 3 month review:

https://thebikingbuddah.wordpress.com/2015/03/17/2015-custom-santa-cruz-nomad-3-month-review/

If you still want more, click below to see my Video home page:

https://vimeo.com/user24675081

2015 Custom Santa Cruz Nomad — 3 MONTH REVIEW

Santa Cruz Nomad Review

IMG_20150107_181036IMG_20150314_181635

Well into 3 months of ownership of my bike, I wish to provide a review about the individual components making up the bike and the overall ride quality of my build.  I’ve put quite a few kilometers on this bike getting accustomed to the novelty of a new ride similar to how an elderly divorced  man fuelled by Viagra starts riding after the arrival of his new mail order bride.  I have ridden mainly technical loamy and rocky terrain on the North Shore as well as some loamy and jump style terrain on Burke Mountain.  For the locals of the North Shore, typical trails I’ve ridden include Dale’s, Pangor, Boogeyman, Corkscrew, and Ned’s on Mount Seymour and Seventh Secret, Espresso, Ladies Only, Executioner and Pipeline on Fromme.   I will divide my review into different components of the bike, then give an overall review.

Drivetrain

IMG_20150308_191054

The XX1 cassette with minimal wear.

IMG_20150317_110055

The XX1 derailleur with some scratches after 3 months of riding, however the gearing performance remained consistent.

I had chosen the SRAM XX1 drivetrain for this bike after quite a bit of debate with my riding friends.  Basically my decision was summed up like this.  A Toyota could do the job but a Ferrari could do the job much better.  Similar to how a driver of a Ferrari will enjoy the benefits of the Ferrari engine in comparison to the Toyota engine, I wanted to enjoy the benefits of this elite drivetrain.  After 3 months of rigorous use, I can report that I have never lost a chain and I’ve experienced efficient, quick and crisp shifting in all instances and conditions that I have ridden in.  Observing the cassette in detail, I’ve observed minimal wear and can report that the machining process of this cassette lives up to the many positive reviews.  My overall synopsis about this drivetrain…Yes it is very expensive…BUT you get what you pay for.  This drivetrain may be an added luxury to some people, but the money spent will be well worth it in terms of quality gearing.  My advice for those choosing an XX1 drivetrain will be to choose a front ring where you will stay in the middle of the gear range for the cassette as this will prolong the life of the cassette.  I rarely use the upper 42 link cog or lower 10 link cog as I chose a 30 tooth front ring that gives me and adequate gearing range without the need to use the upper limits

Wheel Set

IMG_20150308_191120

Beyond a few cosmetic scratches, this Carbon rim prototype performed well beyond my expectations at the 3 months mark. Courtesy of James Kim, prototype of Shore Wheels.

Thanks to my friend James Kim at Yuho Sports, I was provided with a prototype in development of a Carbon wheelset equipped with Atomlab hubs and built in North Vancouver.  Yuho Sports in North Vancouver is in the production stage of Carbon Rims to handle North Shore style terrain called Shore Wheels.  He had kindly provided me with this Carbon wheelset hand assembled in North Vancouver in exchange for me providing him feedback about the overall Carbon wheelset quality and how it responded to North Shore style terrain.  Overall, I would say that the wheelset performed well beyond my expectations.  The Atomlab hubs contain 102 points of engagement, compared to 72 with Chris King and 120 with Industry 9 and I definitely noticed the 102 points of engagement while coasting and then pedaling.  I was treated to instant catching and hence transfer which helped on my climbs and gave me great periodic bursts of acceleration.  The rims were beadless (outer width 38mm, inner width 32mm, depth 32mm) and were paired tubeless with my Hans Dampf (width 2.35) tires.  Combining the inner width and depth of the rims with the width of the tire, I always had plenty of traction in even the wettest and muddiest conditions.  The power transfer involved with Carbon rims significantly helped on my ascents, I was able to efficiently climb not only flat enduro style trails but surprisingly many technical trails (ex. Bridle Path, Seymour) as well.  On the descents is where I really felt the advantage of this wheelset.  I always felt an increasing speed while coasting on this bike, it seems as if the Carbon wheels made the bike so nimble and quick that it just wanted to run away from me.  I was extremely surprised by just how big a difference the addition of a Carbon wheelset had made in my ride quality.  I had been instructed to constantly record my pressure settings for both rear and front tire (28psi rear, 26psi front) before each ride.  Beyond a few scratches, upon close observation, there was no damage to the Carbon rims whatsoever despite me riding on aggressive and advanced technical trails as well as doing some intermediate sized drops (ex. Boogeyman, Seymour).

IMG_20141215_185853

Individually hand built on the North Shore, I can rate this Carbon wheelset prototype (Shore Wheels) as performing surprisingly beyond my expectations. Courtesy of Yuho Sports, North Vancouver.

Brakes

Shimano Zees, 4 piston braking power.  I report these brakes being of excellent value.  They provided me very efficient modulation and braking power especially when things got hairy.  At times, due to the high performance of this Carbon bike, I found myself in need of fast and powerful braking which was well accompanied with these brakes.  With the fast response time, these brakes had saved me on many instances from some potentially hairy situations.

Handlebars/Stem/Cranks

IMG_20150308_191134IMG_20150308_191151

Raceface SixC 20mm rise Carbon handlebars.  Yes, they reduce vibration extremely well and are very light weight but initially I can report that the stiffness of these Carbon bars made me a tad bit uncomfortable.  After a few weeks, I had accustomed to the stiffness and now wonder how I went so long without a Carbon handlebar upgrade.  The ergonomics of the bar are exceptional.  They work great when negotiating tight switchbacks, leaning back when charging through rock gardens, or pulling up when sprinting.  Overall the ergonomic design was very welcome and a welcome tradeoff for the initial stiffness.  The solid Raceface Atlas stem combined perfectly with the bars for a creak free and comfortable cockpit.  The SixC carbon cranks having hollow crank arms are the lightest cranks on the market.  I’ve observed that there is no flex with these pedals, there is direct power transfer from the pedals through the drivetrain leading to highly efficient pedaling.  On numerous occasions, this power transfer helped me on instances where I need rapid fast acceleration on short stretches.  With no loss of power transfer, I am able to quickly accelerate up technical climbs that would have otherwise not been possible.  I’ve ridden a lot of rocky terrain (Mt. Seymour) and have had numerous instances where the cranks have contacted loose rock.  So far except for a few scratches from rocky terrain, the cranks have held up to the high level of Race Face claims.  One criticism I would have is that I do observe the occasional pedal strike especially when doing some XC climbs.  This could have been minimized with the choice of 170mm crank arms (or even 165mm) rather than 175mm.

Final Thoughts and Overall Value

To keep things all in the family I chose to match up the RS pike with the equally capable Debonair RCT3. This allows for an easily matchable tuned suspension feel up front and out back.  After a bit of trial and error playing with the rebound and compression and sag, I had the perfect setup with about 36% rear sag and about 30% front.  The rear seems a bit high but I find I need this because of my higher center of gravity.  As for the geometry of the bike frame, I feel extremely confident and in control and find myself continually pushing my limits and progressing.  The low bottom bracket leads me to a feeling of extreme control on my cornering around berms and the adequate chainstay length has always given me control around tight switchbacks and I’ve found it is very easy to manual with this bike.  The biggest surprise for me about this bike is hands down the climbing ability.  I would rate my bike as a well above average XC climber and a top level enduro climbing bike, I’ve spoken in detail about the power transfer leading to this climbing ability in the details above.  Overall, over the last 3 months of riding, I’ve achieved endless adrenaline bursts that have only been balanced by my post ride B.C. bud.

temp_1426282976818.1574321401

IMG_20141106_162832

The author hard at work or is he hardly working?

OVERALL VALUE

So the biggest questions that I have been asked over the last few months were the following how much did the bike cost and was it worth it?  The total build cost was 2 times the value of my 2001 Volkswagen Jetta. I do believe that this bike and build is worth every penny as I’ve progressed my skills both mentally and physiologically.  With my fondness for and high performance of this bike, I find myself riding a lot more often.  Mentally, I believe that riding this bike (and mountain biking in general) has made me acutely more alert and has helped me professionally in terms of the way I handle my job.  Progressing my skills on the mountain and achieving “flow” regularly on the trails has developed and enhanced the neural networks in my brain or in other words, I find I am using more of my brain’s potential power.  This has lead me to not only more overall happiness but I also find myself performing my job in a more efficient “kaizen” state, thus paying tribute to my partial Japanese ancestry.  At work and life in general, I’ve found my efficiency and creative potential increase in proportion to how often I ride.  Physiologically I’ve benefited in that I can regularly tackle a 1000 meter climb without overly exhausting myself, I don’t need to explain the cardiovascular benefits of this.  While explaining the cost of my bike to mountain bikers, they will usually take a look at the spec range on my bike and sum up that it is a great build.  When I explain the cost to a non mountain biker, their eyes virtually shoot out of their sockets in shock at the cost.  I can not rationalize my spending on a bicycle to them as they generally lack the comprehension of the benefits of mountain biking for both the mind and body.  If you compare the quality of life and overall happiness of your average avid mountain biker with the average successful capitalist, I can almost assure you that the ratings for quality of life and overall happiness will be a lot higher for the avid mountain biker than the successful capitalist.  I refuse to get into a philosophical argument over the value that my bike has for me with a capitalist as I believe that we as mountain bikers are leap years ahead of capitalists in terms of philosophical thinking!

IMG_20150315_164401

The author after a dirty, wet and happy ride on the Shore!

Special thanks to James Kim at Yuho Sports in North Vancouver for the Custom Carbon Wheelset.  Feel free to contact him below for any additional details regarding his prototype Carbon wheelset (Shore Wheels) at james@yuhosports.com or by phone at 1 604 782 9750.

558654_409179699147683_1175878633_n

Special thanks to Tavish at Vidiom graphics for the custom decals.  If you need custom decals, feel free to send him an email.

Vidiom Graphics

For additional articles/reviews by this author, click on the following:

Santa Cruz Carbon bicycles:

https://thebikingbuddah.wordpress.com/2014/10/16/he-carbon-craze/

Devinci Spartan test ride:

https://thebikingbuddah.wordpress.com/2014/10/20/devinci-spartan-test-ride-enduro-craze/

Night riding (lumens):

https://thebikingbuddah.wordpress.com/2014/10/30/night-riding-how-many-lumens-do-you-really-need-testing-1500-versus-3000-lumens/

Sugoi RSX Neoshell rain jacket:

https://thebikingbuddah.wordpress.com/2014/11/26/sugoi-rsx-neoshell-jacket-windcoldrain/

Santa Cruz Nomad – my custom build:

https://thebikingbuddah.wordpress.com/2015/01/08/2015-santa-cruz-nomad-custom-build-first-look/

If you still want more, click below to see my Video home page:

https://vimeo.com/user24675081

2015 Santa Cruz Nomad — Custom Build, first look!

Testing the 2015 Santa Cruz carbon fleet.

My new bike, it has been revealed.  The Santa Cruz Nomad, the all mountain bike of the year as nominated by Pinkbike. This award along with the recent hype involving the success of the Santa Cruz Syndicate and “Ratboy” combined with promotion by marketable athletes such as Danny Mackaskill leaves the company sizzling hot.  I had instantly fallen in love with the Nomad over other all mountain bikes after I test rode it a few months ago.  I decided to purchase the frame independent of the parts and build up the bike according to my choice of components.  In this article, I will quickly go through the custom build of this bike, go over my choice for each component and finally give a brief review of the build and bike.  In future articles, I will give a more detailed review of the independent components of this bike.  I won’t talk about the fork(Pike) or shock(Monarch) in this article as they are pretty standard choices for this bike.

IMG_20150107_181036

2015 Nomad Carbon C overlooking Science World in Vancouver, BC.

Vidiom Graphics

Feel free to contact Tavish at Vidiom for any graphic inquiries.

Custom Decals
The first thing that will stick out from this bike are the Custom chrome decals.  Yes this color scheme isn’t for everyone, but I much prefer it over the bubble gum blue and pink (smurf) or the plain stealth black colors.  Studies have shown that the rider is inclined to ride his bike more often if he feels a stronger attraction to the appearance of the bike. I have never really desired a flashy sports car so I choose to deck out my bike and I feel that this is much more rewarding.  If you like the decals and want more information on custom decals and/or frame protection for your bike, click on the link below to be in contact with Tavish at Vidiom Graphics in Squamish, BC (sales@vidiomgraphics.com).

IMG_20141205_200949 IMG_20141205_200933 IMG_7733 IMG_20141205_210918

Wheelset Choice

IMG_20141215_185900

Atomlab 102 hubs offering 102 points of engagement. The “slack distance”, or the fraction of a rotation your cranks must travel, is decreased before the force you apply to the pedals is transferred to the rear wheel leading to snappier, more responsive accelerations.

IMG_20141215_185853

It is the author’s opinion that the choice of a good wheelbuilder is just as important as choice of wheelset.

So what wheels to get?  Carbon or no carbon was the big question.  The debate about carbon wheels will go on and on.  My opinion was basically this, they are still in the early stages of development and it is still trial and error.    I will be doing a lot of climbs on my bike, so for optimal power transfer per pedal stroke, I want Carbon.  But was I going to pay upwards of $3500 for an ENVE wheelset?  Hell no, I do believe I was raised with common sense.  My friend James Kim at Yuho Sports in North Vancouver had provided me with a prototype of Carbon rims that he is producing for use on the North Shore.  They are built with a rear Atomlab 102 hub and Hope hub upfront.  Atomlab, despite the fact that it is slightly heavier than DT Swiss 240 offers 102 points of engagement for instant catching and hence acceleration.  I will do some technical climbs and so the “slack distance”, or the fraction of a rotation your cranks must travel, is decreased before the force you apply to the pedals is transferred to the rear wheel leading to snappier, more responsive accelerations.  I will write a detailed future review on the performance of this wheelset in a future article.

IMG_20141215_211242

Finished rear wheel with XX1 cassette.

Brakes

IMG_20141121_181256

The front Shimano Zee brake with an weight of 316 grams.

IMG_20141205_210929

Shimano Zee brakes, affordable and do the job well.

Choice of brakes was easier for me.  I have been using
Shimano Zee 4 piston brakes for over a year now on both my downhill and previous all mountain bike.  Many people recommended XTR brakes to save some serious grams.  I did a quick weight of my Zees when taking them off of my bike.   The total actual weight of both brakes was 647 grams.  On average, XTR brakes will weigh 475 grams for both.  The difference with choosing Zees is about 177 grams which translates into 1/3rd of a pound BUT you get the stopping power of 4 pistons rather than 2.  I chose Zee’s as they are light weight, durable, powerful, and because of my pleasant experiences in the past with them.

 Dropper Post/Seat

reverb-stealth-150mm-vario-sattelstuetze-remote-connectamajig-102675

150mm internal cable routed Reverb stealth dropper post.

Race Face Atlas Saddle, light weight but a bit uncomfortable on long rides.

Race Face Atlas Saddle, light weight but a bit uncomfortable on long rides. Most importantly, I have a permanent map of Whistler when I get off the saddle.

The choice of the dropper post was fairly easy.  The RockShox Reverb Stealth dropper post has consistently been highly rated and recommended by most of my friends in the bike community.  The other option was KS Lev which is lighter for weight weenies like myself but the Reverb was consistently reviewed well and so became the obvious choice.  On my previous bike I had a 125mm length and for this bike I opted for the 150mm length.  It seems like a small difference but I would recommend anyone to choose the 150mm length as you will feel the difference.  I am 6 feet tall and have a relatively high center of gravity, and so the maneuverability that the extra 25mm offered was welcome.  The seat chosen was Race Face Atlas, I chose this seat so that I can have a map of Whistler below my ass when I get lost trail riding in Whistler.  It is a lighter seat at 168 grams and so for longer rides, it is a good idea to wear a shammy for added comfort from a sore ass.

Drivetrain

IMG_20141205_200758

SRAM XX1 cassette. Except for its largest cog, which is aluminum, the entire one-piece unit is machined down close to its final shape (minus the teeth profiles) from a steel ingot.

IMG_20141205_200926

SRAM XX1 rear derailleur.

The choice of the drivetrain involved deep philosophical thought and many sleepless nights.  In the end, I chose the SRAM XX1 drivetrain.  Why did I choose this with so many other options available(X01, One Up,etc.)? What I ultimately wanted was crisp and quick shifting and something that was durable, reviewed well and required little maintenance.  The added benefits of remaining quiet and no chain guide requirement were also attractive but I was more focused on reliability.  The price difference was surprisingly negligible between the X01 and XX1 for me and so the only other option was the One Up Components 42 tooth ring.  One Up has been reviewed very well and would save anyone a bit of money so it is a very useful option.  In the end, I chose the XX1 because I adore the technology.  The cassette is very impressive.  Except for its largest cog, which is aluminum, the entire one-piece unit is machined down close to its final shape (minus the teeth profiles) from a steel ingot.  I believe that you get what you pay for.  Keep posted as I review this drivetrain in future posts and see if this classic saying holds true.  I will report on shifting, performance and durability over the upcoming months.  I use a 30 tooth front ring and will probably change to a 32 tooth in a few months as I progress and my legs get stronger.

Handlebars, stem, cranks

IMG_20141215_190646

The lightest Cranks on the market, Race Face Six C Cinch.

I wanted something durable, light weight and able to handle rougher terrain (ex. The Shore).  I wanted a solid stem that can withstand big hits and Carbon bars to dampen vibration.  Also, I needed good solid light weight cranks to maximize pedaling efficiency.  Thankfully, RACE FACE was the answer to all my requirements.  I chose an Atlas stem (proven strength), Six C 35mm bars, and Six C Cinch 175mm cranks.  The cranks are the lightest on the market right now and the bar handles extraordinarily.  I would even recommend the bar as an upgrade to anyone with a DH or AM bike to help reduce vibration.  Yes, I admit my bias for Race Face being a lifelong citizen of Vancouver.  Quoted directly from their website below:

“Based in Vancouver, B.C., Canada, Race Face Performance Products has been designing and manufacturing leading-edge performance cycling components, clothing, and protection for more than 20 years. We are a global cycling brand with product distribution in more than 40 countries and a roster of multi-disciplined professional athletes and organizations around the world. As a company of riders who design and test on North Vancouver’s infamous ‘Shore’, you can be sure Race Face products have endured some of the most abusive riding conditions.” 

I will review these products together in a future post along with my opinion of Race Face to determine if Race Face met my requirements.

IMG_20141205_201028

Is the stem as solid as it appears? I will report on the durability of the Atlas stem in future posts.

Final Thoughts

IMG_20141218_180011

Weight: 28.87 pounds with pedals and 27.70 pounds without pedals.

For all you weight weenies.  The weight of the bike is 28.87 pounds with pedals and 27.70 pounds without pedals. The cost if you want to know, feel free to message me, I am happy to share in private.  I purchased and assembled this bike for one reason only, it gives me immense pleasure.  I feel pleasure in knowing that I have a bike spec’d to my liking.  I feel satisfaction in riding this bike and look forward to each ride.  I believe I have put good thought in my choice and ultimately I will be rewarded in terms of good cardiovascular health (1000 meter climbs to get to my descent).  We live in a Capitalist world where we are encouraged to purchase more and more without thinking too much about it and are lead to spend excessively.  I’ve contemplated for many hours whether I am just a victim of Capitalist desires.  However when I am driving home from work in my beat up Honda heading to the mountains for an after work shred, I believe that I am much happier than the stressed out Capitalist riding home next to me in his flashy BMW or Mercedes.

IMG_20141217_210048nopm IMG_20141221_142123

On a final note I would like to thank Ben Dhiman and Brock Fisher for sharing their product knowledge and experiences with me.  And a special thanks to James Kim at Yuho Sports for assembling my bike.  Feel free to contact him for any questions and bike assembly needs in North Vancouver, he is more than happy to be of assistance. His website is http://www.yuhosports.com/

For additional articles/reviews by this author, click on the following:

Santa Cruz Carbon bicycles:

https://thebikingbuddah.wordpress.com/2014/10/16/he-carbon-craze/

Devinci Spartan test ride:

https://thebikingbuddah.wordpress.com/2014/10/20/devinci-spartan-test-ride-enduro-craze/

Night riding (lumens):

https://thebikingbuddah.wordpress.com/2014/10/30/night-riding-how-many-lumens-do-you-really-need-testing-1500-versus-3000-lumens/

Sugoi RSX Neoshell rain jacket:

https://thebikingbuddah.wordpress.com/2014/11/26/sugoi-rsx-neoshell-jacket-windcoldrain/

If you still want more, click below to see my Video home page:

https://vimeo.com/user24675081


santa cruz
unnamed558654_409179699147683_1175878633_n

10665780_10152697480449162_3933871133943560274_n

br50

SUGOI RSX NEOSHELL JACKET (WIND,COLD,RAIN)

Rain Jacket Reviewed.
RSX COVER

The author in his true Canadian fall/winter outfit. The all Canadian classic, shorts and a rain jacket (RSX Neoshell).

Well into the cold autumn season here in Vancouver earlier this month, I decided to purchase a riding jacket that fit well with the elements of the beautiful Pacific Northwest.  These elements include rain, wind, occasional snow, and colder but not freezing temperature ranges.  The first thing that came to my mind was GORE bike wear, but thanks to my friends in the riding community many suggested the Sugoi RSX jacket.  Sugoi claims that the RSX with the Polartec Neoshell fabric offers rainstorm immunity while possessing unrivaled breathability.  Sugoi is so confident in the NeoShells’ ability to retract moisture away from your skin that it has omitted pit zips and vents entirely.  Now a bit about me, I do sweat excessively, I have also been told that I may be hyperhidrotic.  I can lose upwards of 3-4 pounds on a 2-3 hour ride.  I choose to work hard and will finish with an average heart rate much higher than my friends on my rides and will end up soaked in sweat.

IMG_20141119_163959

The author posing with a constipated posture and look on his face with his mountain bike.

IMG_20141124_163406

The author posing in happier times with his road bike.

I was pleasantly surprised as Sugoi is a British Columbia based company with its headquarters in Burnaby, BC.  They employ BC and Canadian residents and so the money spent on their products is directly benefiting my city, province and country.  As much as possible, I choose to purchase and use products from the Pacific Northwest.  Quoting directly from the Sugoi website:

“Bred in British Columbia, Canada from towering granite peaks and verdant coastal rain forests, SUGOI’s product designs have been shaped by its environment from day one. Since 1987, our origins and the harsh Canadian climate have forged a culture of innovation and resolve that can be summed up in one word: Incredible.”

I was very skeptical about NeoShell and their claims as I have always ridden either very cold with not enough layers or overly hot wearing too many layers.  Was the Sugoi RSX jacket the cure??  Read below to find out.

INITIAL IMPRESSIONS

IMG_20141119_165604

The weight of the jacket at 322 grams without the hood, this weight is consistent with the advertised Sugoi weight claim.

IMG_20141118_192142

The reflective accents definitely increase visibility as seen by this exaggerated night photo.

pocket photo

With the lifestyle of the Pacific Northwest in mind, Sugoi has cleverly engineered the chest pocket to allow easy and quick access to post ride BC bud.

My first impression was that this jacket was light, I was surprised that this jacket was not going to be overly weighing me down as being a both a mountain biker and a roadie, I am considered a weight weenie.  It also fit comfortably as the fabric was not hugging my body too tightly.  The jacket contained 3 pockets for storage of cellphone, spare tubes, C02 pump, energy bars, and other ride essentials.  I would consider the pockets of good size as I was never running out of space to store my things.

THE TESTING

See the authors ride log below:

DateTime Location, Trails Type of Riding Distance** Temperature* Additional Clothing Wind** NotesObservations
Tues, Nov. 11,11:30am-4:30pm UBC loop, Marine Way Burnaby – Richmond loop Road cycling 96km 6-8 C.Started with just Neoshell Jacket and Bontrager RXL bib tights, and POC gloves.  Due to cold, added skull cap, additional gloves, merino woll base layer, and booties 33-41 km/h Extreme wind chill. Temperature felt colder than actual due to wind chill.  Mainly flat road riding with little ascent or descent.  Felt extremely cold at beginning and stopped to layer with Merino wool base layer and thermal booties.
Sun, Nov. 16,12 noon-4pm Mount Seymour, LCSR, OLD Buck Rd, Trails included Bridle Path, Baden Powell, Severed Dick, Pangor. Mountain, XC, steep gravel climbs, downhill. – 3 laps up and down. 3-4 C.Merino wool base layer, 2 gloves (thin POC plus merino wool gloves), shorts, POC VPD 1.0 knee pads. Not applicable as was in forested mountain Felt mild chills on first lap, descended to car to layer with thicker gloves after first descent.
Tues,Nov. 18,5:45-7:30pm Burke Mtn. Trails: Slayer, Overtime, Braap, Green Bastard. Mountain, Enduro type riding 2 laps, up and down 8-9 CMerino wool base layer, thin POC gloves, POC VPD 1.0 knee pads. Not applicable Steep climb that extends to 20% at times, Measured Max Heart Rate was 75% of maximum, 160 bpm.Felt comfortably warm and not overheated.
Sat, Nov. 22,2:30-4:45pm Road ride from Sussex and Rumble in Burnaby to Richmond dyke and back. Road cycling 55km 7-8 CMerino wool base layer, Sealskinz Performance Thermal Road Cycling gloves, Bontrager booties, Bontrager RXL softshell bib tights. 10km/h Comfortably warm.  Felt that the gloves were mildly overheating as they were not breathable.
Mon, Nov. 24,6:15-6:30pm Mt. Seymour Climb, from Old Buck Trailhead to peak and back. RoadCycling 25km900metre climb 7 C.  Reported temperature but colder as I was climbing.Rain, heavy at times, snow at peak of mountain, foggy.Merino wool base layer, skull cap,

Sealskinz Performance Thermal Road Cycling gloves,

Bontrager RXL softshell bib tights and booties.  Sealskinz merino wool socks.

17-20km/h Average cadence on climb was 76.  1 hour 8 minutes to climb 900 metres.Felt comfortably warm on climb.  Hands and feet felt extremely cold on descent.  Both waterproof gloves and socks had failed.  Upper body was kept warm.
Sat,Nov. 29,12-2:30pm Road ride from Sussex and Rumble in Burnaby to Richmond dyke and back. Road Cycling 49km -3 C to -5 C.  Roads were wet at times and frozen, some snow on certain sections of road.Wore Sealskinz merino wool socks, Sealskinz performance thermal Road gloves, Bontrager booties, balaclava, merino wool base layer. 15km/h Average Cadence 91.  Felt comfortable and not cold.  Head felt slightly cold due to ventilation in helmet.  Was pleasantly surprised that I wasn’t cold despite the extreme temperatures.

Impressions/Analysis of Above:

WIND:  I had experienced at times, very high wind conditions (41km/h on November 11) and felt my front tire on my road bike almost being blown away.  The Neoshell jacket was very comfortable in instances of high wind.  I didn’t feel any extreme chill wearing this jacket during extreme wind conditions, these effects were the combination of the base layer (merino wool) and the jacket.  Needless to say, I didn’t feel that bone chilling cold that I experienced with other jackets in the past.

IMG_20141129_135527

Special thanks to Ben Dhiman for providing me with a nice shot of Laphroaig whiskey at the midpoint of my ride (Km. 24.46) on Saturday, November 29. This fine single malt scotch kept me warm for the ride back home.

IMG_20141129_150353

My road bike following a cold winter ride.

COLD:  Temperatures during my testing varied between -4 to 9 degrees Celsius, this range is very typical of the Pacific Northwest winter.  During my testing I had experienced cold on my upper body only on 1 instance (November 11), this was because I didn’t wear any base layer during the beginning of my ride.  For the above stated temperature range, the Sugoi jacket had kept my upper body comfortably warm as long as I was wearing a base layer.

RAIN:  My testing involved various amounts of rain with the most significant being on November 24 (see ride log above).  For rain testing, I mounted 550 lumens on my helmet and decided to do the Mt. Seymour climb on my road bike. I was consistently hounded for 1 hour and 45 minutes by constant rain with heavy rain at times.  My extremities felt extremely cold after this ride (hands/feet due to poor choice of socks and gloves).  My upper body was kept dry and warm, the merino wool base layer was soaked with my sweat but otherwise there was no penetration of the rain through the jacket.  My only criticism for the jacket design would be that it doesn’t have a flap that extends below the back.  During my descent, I had water kick up from the rear wheel and entered my car with a wet bottom that also left me feeling a bit cold.

BREATHABILITY:  For me as someone considered to sweat excessively this was the make it or break it point in the evaluation of this jacket….. I found the Sugoi RSX Neoshell jacket to be extremely breathable and the Sugoi claims regarding unrivaled breathability are completely valid.  I had tested this jacket in situations where my heart rate was put to the test (20% grade climb at Burke Mtn on Nov 18th, multiple XC climbs up Old Buck Rd on Nov 16th, as well as a 900 meter road cycle climb on Nov. 24th).  I had never felt overheated wearing this jacket, my face was at times dripping sweat, however the breathability of the Polartec fabric allowed my upper body to breathe without that clammy overheated feeling I felt on my climbs in the past.

OVERALL RATING:  I would rate this jacket as an excellent value at $300.  My only criticism would be for any commuter or rider that does excessive rain/wet weather riding, to consider the fact that it doesn’t have a back flap that extends over your ass.

COLD WEATHER RIDING

I will describe cold weather riding as armored trench warfare.  You must be prepared and go into battle with the elements fully armored.  Armament in this case being booties, high quality gloves, jackets, etc…..  Winning the war (finishing the ride) leaves you with a sense of accomplishment and satisfaction.  Losing the war leaves you exiting wounded with a sense of defeat and never wanting to attempt a cold weather ride again.  PREPARE yourselves for a cold weather war and leave each war victorious and seething of adrenaline!  Each individual is different in terms of their cold tolerance and the amount that they sweat.  Cold weather gear must be individualized taking this into account, take a look below at some of my armaments for the cold weather battle.

IMG_20141122_171100  IMG_20141122_171017IMG_20141116_135613nopmIMG_20141124_163412

IMG_20141129_130941

This full face balaclava has dual functionality, not only keeping you warm during your ride but also as a disguise for robbing the bank to afford upgraded bike parts for my mountain bikes.

AUTHOR BIAS

Example of Pacific Northwest beauty.

I will admit my bias for Sugoi being a Pacific Northwest company.  How can I not?  With the Pacific Northwest being home to the North Shore mountains and surrounding me with their year round beauty and providing me with endless hours of pleasure, I admit my bias in supporting a BC company based out of Vancouver and this may potentially influence my opinions in this article.

ABOUT THE AUTHOR

IMG_20141106_162832

The author in an interesting paradox, he is hardly working yet hard at work……

Jas Dhiman, is a mountain bike enthusiast, road cyclist, and a pharmacist.  I believe that a good review of any product can never have too much information, I strive to include every possible detail in each review to help the consumer make an informed decision.  With my work as a pharmacist, I regularly evaluate clinical medication studies for efficacy and to determine bias within the study.  My wish is that my knowledge and experience in clinical drug evaluations is reflected in each of my reviews.  Bias exists in any review and evaluation of any medication or product.  To further help the consumer make an informed decision, I will include information about my own perceived biases at the end of each review.  I review products and write these articles simply to pursue my 2 biggest passions, my love of research analysis and my equal love of physical exercise and in particular cycling.  I choose to exercise my mind writing these articles and my body while cycling to test these products. Essentially, I believe the key to true happiness is not achieved by monetary pursuits but by an equilibrium of a healthy mind and body!

For additional articles/reviews by this author, click on the following:

Santa Cruz Carbon bicycles:

https://thebikingbuddah.wordpress.com/2014/10/16/he-carbon-craze/

Devinci Spartan test ride:

https://thebikingbuddah.wordpress.com/2014/10/20/devinci-spartan-test-ride-enduro-craze/

Night riding (lumens):

https://thebikingbuddah.wordpress.com/2014/10/30/night-riding-how-many-lumens-do-you-really-need-testing-1500-versus-3000-lumens/

If you still want more, click below to see my Video home page:

https://vimeo.com/user24675081

sugoi_des_06_logo_cmyk_1700

logo_raceface558654_409179699147683_1175878633_n

IMG_20141016_122900

Night riding…how many lumens do you really need??? Testing 1500 versus 3000 Lumens…..

Night lights

“All propaganda has to be popular and has to accommodate itself to the comprehension of the least intelligent of those whom it seeks to reach.” ——Adolph Hitler

Night riding season is well upon us.  I’ll use the quote above to welcome the season and all the added propaganda in terms of night riding light sales and the promotion of using more powerful lights.  Since using night lights for the first time, I have gotten hooked to this technology similar to how an Amish rebel will get addicted to technology after being deprived all his life.  In this article I will go over how many lumens are really necessary for night riding, review a couple of popular light brands, and finally go over some essentials required for night riding for anyone new to night riding.

The author in the never-ending pursuit of spiritual enlightenment. This pursuit is enhanced with the addition of 1550 lumens!!!

Night riding is inherently challenging and involves fear.  This isn’t just fear felt by your girlfriend when she hears about you venturing into the woods alone armed with nothing other than your night lights and kneepads.  I have felt an innate sense of fear on many occasions night riding and will never forget some of my memorable rides filled with fear.   See below for a video of what my freeride idol Richie Schley says about fear.

In my opinion fear is productive.  Fear will trigger the sympathetic nervous system to release adrenaline and prepare you for the fight or flight response.  Fear releases adrenaline activating your muscles, increases sweating, heart rate and blood pressure, dilates your pupils and challenges your body to respond.  In my experiences, I’ve had some of my most satisfying rides night riding with a bit of fear.  I’ve felt a strange shaky feeling of nervous happiness leading me to yell out with joy at the bottom of my runs.  These feelings are a part of the adrenaline release.  Night riding is a challenge, you must be focused, pick your line and commit to it.  With less light this challenge ultimately leads to the rider progressing his or her skills.

Since purchasing my night riding lights last year, there has been a big change in terms of the amount of lumens required for night riding.  Roughly this time last year I happily purchased Serfas lights (a total of 1550lumens, 550 helmet, 1000 handlebars) from my LBS.  Upon going back to my LBS (local bike shop) this year, a friendly salesman informed me about the new light options available, massive amounts of lumens in the range of 3000-4000 at a minimum.  I left my LBS feeling extremely insecure and self-conscious like a Joey in jeans and New Balance runners waiting in the lineup at the Whistler Bike Park for his first run.  On my drive home, I questioned myself….do I really need more lumens or is it all in my head?  Like a good mountain Buddha, I migrated deep in the North Shore forest, meditated and reflected upon this important philosophical question.  The following is my opinion about required lumens while night riding, feel free to disagree and read other opinions before making your choice.

Firstly, I want to state that the mountain bike industry like any other industry is subject to marketing, hype, and overloading the consumer with sometimes incorrect information to sell products.  As a healthcare professional, I will always question what is being marketed to me and determine if there is any bias.  Bias in this case being the bike industry promoting and selling products for financial gain.  Taking this into consideration, I asked myself the following 2 questions.

1) Despite increases in technology, is it really granted to upgrade your night riding lights after only 1 year?

2) After I upgrade this year to more lumens, won’t I have to upgrade again next year?  Won’t next years products be yielding better technology with lighter lights and more lumens?

IMG_20141107_125434

The Author’s Serfas night lights (1500 Lumens total).

IMG_20141107_125322

Light & Motion lights (Seca Performance series, Taz), 3000 Lumens total.

Thanks to my friend James Kim at Yuho Sports in North Vancouver and the country of South Korea, I had the opportunity to answer these questions (he has let me borrow his Light & Motion lights).  I will compare 2 different light brands, my own Serfas with the Light & Motion lights that he provided me.  My own lights have a total of 1550 lumens (1000 lumen handlebars, and 550 lumen helmet).  James Kim, the mountain biking pride of South Korea kindly provided me with a total of 3000 lumens (Seca Performance series 2000 lumens handlebars, Taz 1000 lumens helmet).

THE TESTING……

IMG_20141106_162824 IMG_20141106_162832Take note of the meticulous attention to details by the author.  Also, take note of his customized TLD labcoat.

IMG_20141107_132425 IMG_20141107_085827IMG_20141107_095014IMG_20141107_095005IMG_20141107_094953IMG_20141107_094925

Upon initial inspection comparing the 2 lights, it is very obvious that the Light & Motion has a larger amount of bulbs, the handlebar light has a total of 6 individual lights versus 2 with the Serfas.  Comparing the helmet mounted lights, the Light & Motion contains 3 individual lights versus just 1 for the Serfas.  Now comparing the actual sizes of the emitted light surfaces of handlebar lights.  The Light & Motion measure 56mm X 40mm whereas the smaller Serfas handlebar light measures 38mm X 20mm.  As you can see from the above images, the handlebar light is almost 2 times as large.  The Light & Motion helmet light measures 48mm X 35mm while the Serfas light measures 21mm X 21mm, again almost 2 times as large.

IMG_20141106_165216 IMG_20141106_164854 IMG_20141107_085551

The weights,charging times, duration at maximum lighting, and respective costs are summarized below:

LIGHT WEIGHT (WITH BATTERY AND MOUNTS)** TOTAL CHARGING TIME FOR FULL CHARGE DURATION OF LIGHT AFTER FULL CHARGE AT HIGHEST SETTING COST***
L & M TAZ 1000 (HELMET) 238.63 grams 5 hours 25 minutes 2 hours 29 minutes $249.00
SERFAS TRUE 550 (HELMET) 225.73 grams 5 hours 6 minutes 2 hours 32 minutes $149.99
L & M SECA PERFORMANCE SERIES 2000 (HANDLEBAR) 335.26 grams 1 hour 59 minutes 2 hours 36 minutes $499.00
SERFAS TRUE T1000 (HANDLEBAR) 365.70 grams 3 hours 11 minutes 2 hours 50 minutes $359.99

**FULL WEIGHT OF LIGHT WITH BATTERY PACK AND MOUNTS**

***COST DOESN’T INCLUDE  TAXES, COST IS IN CANADIAN DOLLARS***

The main point to note above is that the Helmet lights do take considerably longer to charge (5 to 5.5 hours) regardless of brand.  Please take this into consideration when preparing for night rides.  Also, the results above for the highest light setting, take note that on the mountain the lights will lost longer if you reduce the amount of light used on your climbs.  Roughly put, seeing that the lights last around 2 hours on the highest setting, plan for a maximum 3 hour ride.

IMG_20141105_134525

Night lights aren’t cheap, an actual receipt showing the total cost of running 3000 Lumens in Canadian dollars with taxes….

HOW THE LIGHTS FELT??

I have been running 1550 Lumens with my Serfas for approximately 1 year now.  The weight difference isn’t substantial between either product.  The L & M helmet light did feel a bit irregular probably because of the larger size or maybe just because I am not use to it.  Other than that, they both mount very easily on both the helmet and the handlebars.  Also, both brands mount very easily to the frame of the bike and there has never been any problems with dismounting of the lights during rides, I fully expect this to be the same for the L & M lights as they have a very similar mounting device to the Serfas.  As you can see above from the design of each of these lights, technology and the rapid progression of this technology had advanced enough to give an Amish senior citizen an immediate heart-attack.

IMG_20141106_185557IMG_20141106_185612  IMG_20141106_185652

The above photos show the lights when they are fully mounted.  The rider will rapidly adapt to easily mounting and dismounting each of these lights, I do admit I felt an added weight to my head mounting the helmet light and it does take a little getting use to.

WHAT IS THE DIFFERENCE BETWEEN 1500 AND 3000 LUMENS???

I’ve enclosed the above 2 videos so you may observe the differences in lighting.  The first with 3000 Lumens and the second with 1550 Lumens.  You may play them together at the same time to get a better visual effect of the lighting.  As you can see, the 3000 lumen lights do give a wider light range than the 1550 Lumens, this is predictable due to the larger size of the lighting units mentioned above.

WHAT DOES A HIGHER AMOUNT OF LUMENS MEAN FOR THE RIDER???

The real question is…….is it really essential to have 3000 Lumens or more while riding?

I strongly believe that night riding can be done at a maximum of 1500 lumens!!!  When I purchased my night lights last year, 1500 lumens was considered more than enough.  Now with all the marketing involved in mountain bike accessory sales, many riders are led to believe that 3000 lumens will be the new starting range.  What will happen next year?  6000 lumens?  When will this end?  Will we ultimately plant night lights along our trails similar to how skiers have lighted trails during night skiing?  1500 lumens is enough with 1000 lumens on your handlebars and 500 lumens on your helmet.  This amount of light will strike the fine balance between necessary lighting and fear.  With this combination you have sufficient light to carry out your run and the fear involved will help progress your skills as a rider.  Of course, the cautious scared rider may want more, however, I feel that more than 2000 lumens is unnecessary.  I really felt no added security, comfort or confidence with the addition of 1500 extra Lumens.  Was my field of vision was brighter and wider??…….YES!!!!!!!  Was this completely necessary?  The answer is a FIRM……NO!!!!!!!!!

I believe night riding should remain a challenge and this challenge leads to progression.  The trail shouldn’t be flooded with light, the challenge must remain and adding more and more lumens only defeats the purpose of this challenge!!!!

ESSENTIALS FOR NIGHT RIDING

1) Try and ride in a group or at least with 1 other.  This isn’t always possible in Vancouver because most of your friends will be busy working 5-6 different jobs to afford the inflated cost of living due to foreign investment overtaking the Lower Mainland.

2) When starting, do trails that are below your capability.  An intermediate trail may feel like an advanced trail to the starting night rider.

3) Always have an emergency contact that you will give a return time to.  Have the contact call you to check up at a pre-determined time.

4) Always carry a cell phone.  This should be kept in a water-proof case in your pocket.

5) Only use trails and routes that you know well.  With intimate knowledge of what is coming up, route contingencies and timings, you can ride with confidence.

6) NEVER, I will repeat NEVER be afraid to walk the trail!!!!!  Yes, we all feel peer pressure by our friends, however, a broken bone is much more painful than any sort of peer pressure.

7) ALWAYS have your night lights charged and ready for action along with a duffel bag with your riding gear prepared for an emergency shred….the moment your girlfriend or wife starts complaining and nagging that your not spending enough time with her…….Run out the door with your bike, bag and lights and seek refuge in the mountains!!!!!!!

8) Finally, ENJOY YOURSELVES…..Yell out loud, sing, scream, LET YOURSELVES GO…… We live in a pent up stuck up world with our emotionless LMAO and LOL’s……..RELEASE all your inhibitions on the MOUNTAINS……No one can hear you EXCEPT the bears BUT they are hibernating at this time of the year and don’t have the energy to get up and eat mountain bikers…………

If you like what you read, click the link below for additional articles by this author:

Santa Cruz Nomad and Bronson, testing:

https://thebikingbuddah.wordpress.com/2014/10/16/he-carbon-craze/

Devinci Spartan, test ride:

https://thebikingbuddah.wordpress.com/2014/10/20/devinci-spartan-test-ride-enduro-craze/

Sugoi RSX NeoShell jacket review:

https://thebikingbuddah.wordpress.com/2014/11/26/sugoi-rsx-neoshell-jacket-windcoldrain/

AND…if you still want more of me, check out my Video Home Page and some of my videos below……

http://vimeo.com/user24675081

I wish to express a special thanks to Shane and the staff at Caps Westwood Cycle, Burnaby.  Thanks for the continued excellent service.

49b35dca8553a27087f905062314bbef_400x400 558654_409179699147683_1175878633_n br50Sport_Club_Corinthians_Paulista_Logo

DEVINCI SPARTAN — test ride, ENDURO craze…….

Testing the 2015 Santa Cruz carbon fleet.
IMG_20141018_161628

The 2015 Devinci Spartan RC Alloy bike ($4799) mounted on the authors 1998 Honda Accord (approx. retail value $1799.99)

With all the hype surrounding Enduro bikes, this weekend, thanks again to Steed Cycles in West Vancouver, I had the opportunity to demo ride the New 2015 Devinci Spartan RC alloy enduro bike.  In my opinion, the mountain biking industry is a marketing genius which markets its products with hype and right now, its seems that all the hype is focused on marketing ENDURO bikes!  Enduro riders like Cedric Gracia are excellent marketing idols as they showcase a healthy, fun and carefree lifestyle competing in Enduro events.

IMG_20141018_130651IMG_20141018_130704IMG_20141020_115310
As can be seen from the above 3 photos, I put my blood, sweat and tears into my testing of bikes.  Blood and sweat for the hard work in riding the bikes to their limits, and shedding of tears at the sheer cost of the bikes and bike products that I’ve been testing.

THE BIKE, specifications:

I felt an initial sense of excitement at the prospect of riding a Devinci.  As a victim of advertising, I assumed that riding a Devinci I would be able to shred through all mountain trails similar to how Stevie Smith shreds downhill trails.  Entering the bike shop, and being a weight junkie, I immediately ordered the diligent, hardworking yet underpaid mechanic to put the beast on the scales, the beast being the bike not the burly author.  With pedals, it weighed in at an impressive 31 pounds, I was immediately impressed as the weight listed on the Devinci website claimed 32.87 pounds.  I felt tempted to hang myself to the bike scale with my teeth to measure my weight to see if I also lost 2.5 pounds, however, after receiving recent dental work, I was a bit scared of chipping a tooth.  The characteristic design of this Devinci Spartan that separates it from other Enduro bikes is the DW suspension design.  DW being Devinci design engineer Dave Weagle with his trademark split pivot suspension design.  The claim being that this design will help the rider pedal better and more efficiently resulting in better power transfer per stroke pedaled.  As well, the claimed benefits of this suspension design will also result in the bike being more active under braking.  With that being said…..off to the testing grounds.

THE TESTING GROUNDS……

Friday October 17th: Burnaby Mountain

Saturday October 18th: Mount Seymour, Fromme Mountain

IMG_20141017_200521IMG_20141018_124646IMG_20141018_150834

I picked up this bike on a rainy Friday night and being a bike bum, I strapped on my night lights, booties, water resistant gloves and fled to the mountains like a hiding criminal.  I decided to test that night at Burnaby mountain, the intermediate level of that mountain would provide a good initial impression of the bike.  I did some XC trails, North Road trail, Lower Moped and then took the gravel road up to Naheno Park.  I descended Naheno Park to do more XC riding along Mel’s trail until I reached Nicole’s trail.  I descended Nicole’s trail then took the street up from the bottom of Nicole’s and did 1 more XC lap of Mel’s trail followed by Nicole’s trail.

I woke up bright and early on Saturday morning and headed straight for Seymour.  At Seymour I tested the climbing and XC ability of this bike climbing from the bottom of Hyannis to Old Buck road, then climbed the gravel Old Buck Rd. to the Baden Powell trail then climbed until Dale’s trail.  I descended this classic North Shore technical trail until the XC trail Forever After, climbed/descended this trail followed by the Hyannis XC trails and Bridle Path until I reached my car.  I then ate a quick sandwich for lunch and drove to Fromme Mountain.  At Fromme, I climbed the gravel road until Ladies Only, descended this trail until Baden Powell trail, and repeated this once more and called it a day.

The description of the trails is a follows:

Burnaby Mountain:

North Rd. Trail and Lower Moped: mainly flat XC trails suited for beginners, some roots and rocks.

Mel’s Trail: somewhat steeper XC intermediate technical trail with some roots and rocks.

Nicole’s Trail: steeper advanced technical trail with sharp switchbacks.

Mt. Seymour

Dale’s Trail: steep technical terrain, lots of rocks and some roots. Best described as classic Shore technical riding.

Forever After: average Intermediate XC trail with some steep technical sections, lots of berms.

Hyannis, Bridle Path: classic Shore XC riding, lots of roots and some steep sections.

Fromme Mountain:

Ladies Only: North Shore Classic, mandatory steep terrain, ladders, skinnies, very technical trails with lots of roots and rocks.

Baden Powell: typical North Shore XC trail, mainly flat (rooty) with some technical descents.

THE RESULTS…..

The big question was how the Spartan would climb?

I must admit I was quite impressed with the climbing capability of this bike, observe the following videos of me climbing at the Lower Seymour Conservation Reserve.

The performance geometry of this bike puts you in an aggressive position while climbing.  This is a combination of the sloping top tube for standover clearance and slack head angle.  I observed these benefits immediately while climbing.  Challenging XC climbs that normally had me pulling over and hiking up with other bikes were overcome with the Spartan.  Feeling powerful and in control of the bike, I was able to confidently climb rooty and rocky technical terrain.  The only criticism I would have for the XC climbing ability of this bike is when the fork is adjusted to 140mm, there is significant pedal bobbing on rocky and rooty regions.  The relatively low bottom bracket of this bike lead to me, very often slamming the pedals into rocks or roots while climbing, this was more evident when the fork is set at 140mm.  Climbing on gravel roads, I felt that this bike performed beyond my expectations.  I was able to climb all gravel roads of varying grades at Burnaby Mountain, Mount Seymour, and Fromme without the slightest exhaustion.

The Descent……

A quick video below of 2 descents on the trail Ladies Only before my GoPro ran out of battery life.

Adjusting the fork and shock to the descent mode, the Spartan really comes to life.  It is a very playful aluminum framed bike.  The combination of the Monarch Debonair Shock and the Pike fork along with the cleverly designed rear DW-link suspension of the bike put me in control on my descents.  I felt confident and in control of the bike while descending all technical and aggressive terrain on the North Shore.  I felt capable of challenging myself and pushing my limits with this bike.

Overall, I would rate this bike as an excellent value for anyone interested in the purchase of a quality all mountain bike.  Although, I wouldn’t use this bike for aggressive and long cross country rides (4-5hr), it has multiple all mountain capabilities backed by Devinci quality.  The starting price point for an all mountain bike is roughly $3500, I would suggest anyone seriously interested in investing in an all mountain bike consider spending a bit more to get this quality steed.

10665780_10152697480449162_3933871133943560274_nunnameduntitled

 FOR ADDITIONAL ARTICLES BY THIS AUTHOR, CLICK BELOW:

Santa Cruz Carbon Bicycles reviewed:

https://thebikingbuddah.wordpress.com/2014/10/16/he-carbon-craze/

Night riding, comparing 1500 versus 3000 lumens:

https://thebikingbuddah.wordpress.com/2014/10/30/night-riding-how-many-lumens-do-you-really-need-testing-1500-versus-3000-lumens/

Sugoi RSX Neoshell jacket review:

https://thebikingbuddah.wordpress.com/2014/11/26/sugoi-rsx-neoshell-jacket-windcoldrain/

AND…If you want more of me, CLICK on my VIDEO home page BELOW:

http://vimeo.com/user24675081

The Mountain Bike Carbon Craze…

Testing the 2015 Santa Cruz carbon fleet.
IMG_20141014_161321

The author with the 2015 Santa Cruz Nomad X01 Carbon C, retail price $7999…..

This past long weekend I had the pleasure of riding 3 different bikes on the North Shore and on Burke Mountain in Coquitlam, BC. The goal of this was to determine the differences between each bike and provide a review below. As well, I wanted to give my independent review about the Carbon craze that has struck the mountain bike scene. I don’t want to do a very technical review about bottom brackets, chainstays, head angles, top tubes, down tubes and test tube babies.  I don’t really understand all that technical jargon and trying to read about it distracts me from watching Rad Company, Not Bad, and Where the Trail Ends for the 50th time each. I just want to ride bikes and have fun, the guys at bike rumor and pinkbike can give you technical details, I just want to provide my mountain biking brothers with a review in layman terms.

THE BIKES…

IMG_20140911_135928

I just finished robbing the bank of Canada….but still don’t have enough money for the purchase of a new carbon mountain bike.

The first bike is my own 2014 Norco Range Alloy 7.1, a trusted North Shore steed that has never let me down and that I’ve owned for 10 months now. With the upgrades (Zee Brakes, dropper post, seat, grips, shifters), I would say that this bike weighs roughly 35 pounds and cost a total of about $5500.

The second bike I tested was the 2015 Santa Cruz Bronson Carbon S version ($4699). Large frame with pedals weighed 29.5 pounds at the shop.  Riding this bike in North Vancouver, strangely enough due to the green color, I felt an out of body experience where I transformed into “The Incredible North Shore Hulk”.

The third bike I tested was the 2015 Santa Cruz Nomad Carbon C X01 version($7999). The large frame with my Mallet DH pedals weighed in at 29.1 pounds. I must confess I did feel an almost magnetic attraction to this bike simply because of all the hype surrounding Santa Cruz.

All bikes were equipped with the same Rock Shox Reverb dropper post (150mm).

4 pic

From left to right. The carbon Nomad, Alloy Range, Carbon Bronson. Top of photo is the author, his frame is composed of a mix of aluminum, carbon, mercury, and plutonium.

A very basic intro about me and my riding style: I have been described as a charger or a bulldozer. I don’t totally agree with that but I’ve heard that more than once so I will write it here. I would describe my riding style as preferring speed rather than riding with finesse and smoothness. I like to think of myself as Cam Neely on a mountain bike. I basically have a passion for mountain bikes and love everything about them , I love riding 29er XC bikes, big hit 26er DH rigs as well as the not so popular AM 650b bikes. I love riding in all conditions and at all times, including night riding, which was one of the factors in breaking up with a recent ex-girlfriend…..”I’m sorry dear, I gotta go mount my bike tonight, not you!”

The testing grounds.  I tested at 3 different locations, Mount Seymour, Fromme, and Burke Mountain in Coquitlam, BC.

Below, are the dates, times, and locations for my testing.

Date: Saturday, October 11, 2014

Bike: 2014 Norco Range Alloy 7.1.

Location: Mt. Seymour

Details: I rode from the bottom of Hyannis doing some XC riding on Bridle path and then climbing a steep gravel road (Old Buck Rd.) to Dale’s Trail, steep descent of Upper and Lower Dale’s trail followed by XC riding down the trail Forever After. Then doing various laps around Hyannis and the LSCR. I’ve done this numerous times and definitely meeting Tippie here today was the highlight. Rode from 11am-3:30pm.

IMG_20141011_174640

Tippie with his Carbon Rocky Mountain Altitude, and me with my Range. I had time to have a laugh and do a quick XC lap with him. When asking him about Carbon bikes…..he simply responded “Carbon, Schmarbon…..just get out and ride.”

Date: Sunday, October 12, 2014

Bike: 2015 Santa Cruz Bronson Carbon S

Locations: Mt. Seymour, 11am-2pm, Fromme Mtn: 3pm-5pm

Details: I rode from the bottom of Hyannis doing some XC riding on Bridle path and then climbing a steep gravel road (Old Buck Rd.) to Dale’s Trail, steep descent of Upper and Lower Dale’s trail followed by XC riding down the trail Forever After, then more XC riding along Bridle Path to Hyannis. This was followed by lunch and a quick 15 minute drive to Fromme. At Fromme, I tested the gravel climbing capability of the Bronson up to Seventh Secret, then descended to Ladies Only. Feeling tired, wobbly and on a new bike, I opted to do Pipeline, rather than Ladies Only. Following Pipeline, I rode down Baden Powell to return to my car.

Date: Monday, October 13, 2014

Bike: 2015 Santa Cruz Nomad X01 Carbon C

Locations: Mt. Seymour, 12-2pm, Burke Mtn. (Coquitlam), 3-5:45pm

Details: I rode from the bottom of Hyannis doing some XC riding on Bridle path and then climbing a steep gravel road (Old Buck Rd.) to Dale’s Trail, steep descent of Upper and Lower Dale’s trail followed by XC riding down the trail Forever After, then more XC riding along Bridle Path to Hyannis. Followed by lunch and a drive to Burke Mountain. Did XC trail riding along the trail Hustler, then followed the gravel road to test jumping along the trail Garbage. After descending, climbed the gravel road to do more jumping along Jumpline, then Lower Triple Crown, followed by Brapp. I climbed again and did 1 more lap of Braap, Hustler and then finally I arrived at my car. Satisfied with my crash free weekend riding and testing, I smoked some good BC Bud and went home.

Description of trails:

Mt. Seymour

Dale’s Trail: steep technical terrain, lots of rocks and some roots. Best described as classic Shore technical riding.

Forever After: average Intermediate XC trail with some steep technical sections, lots of berms.

Hyannis, Bridle Path: classic Shore XC riding, lots of roots and some steep sections.

Fromme:

Seventh Secret: Armored technical trail with steep sections and sharp switchbacks.

Pipeline: Intermediate/Advanced trail with some optional skinnies, ladders, teeter-totters, and some steep technical sections.

Baden Powell: classic shore XC.

Burke Mountain:

Garbage: Rooty filled with manmade and natural drops (maximum hip height).

Jumpline: Jump trail with manmade drops at 5-10 metre intervails.

Lower Triple Crown: Very technical, lots of loam, lots of roots, minimal rocks.

Brapp: Technical similar to Garbage but with more jumps, some rooty sections.

IMG_20141011_165536 IMG-20141013-WA0002IMG-20141013-WA0029

THE RESULTS, my impressions of each bike.

2014 Norco Range Alloy 7.1

My tried and tested bike that has allowed me to progress my skills over the last ten months of faithful ownership. As always, being a Norco, it was a consistent performer. My biggest criticism with this bike is the Fox float 34. It just didn’t feel right plush or comfortable compared to the RockShox Pike forks on the Santa Cruz bikes. However, beyond this, I felt comfortable and stable. Great geometry, the bike was an average climber on hills and performed average on the XC terrain. On the descent, I would describe myself as being comfortable but not overly confident. In other words, I didn’t feel particularly aggressive and risk taking as I have with other bikes. I won’t say much more about this bike as I will use it as the reference to compare the 2 Santa Cruz carbon bikes.

IMG_20141014_182753

Like a good mail order bride, the Range performs well and takes everything you throw at her. Appearance of bike day after riding.

2015 Santa Cruz Bronson Carbon S

Curious to see the XC performance of this entry level Carbon bike. I was immediately impressed with the climbing power. I was able to quickly and efficiently climb all technical rooty and rocky areas along Hyannis and Bridle Path. I felt refreshed and unstoppable on my climbs. I noticed immediately the effect that the 67 degree head angle had on the climbing ability of this beast. I felt confident and in charge on even the more steep XC terrain. Getting to Old Buck Road, a quite steep gravelly climb, I felt full of energy and was able to climb without any breaks. I arrived to Dale’s Trail in record time and fatigue free. Descending down Dale’s trail, I felt the immediate effects of the 67 degree head angle. To balance my body on the bike during the many steep descents, my ass was regularly touching the rear wheel and my face was inches from the stem. Despite the fact that I was riding a Carbon bike, I didn’t feel particularly confident nor comfortable on my descents. Saying this, the RockShox Pike was very reactive and plush and I was able to cover all descents. The Bronson proved an XC champ covering the XC terrain back to my car. It performed quickly and efficiently on the small climbs, berms, and technical terrain back to my car. I then quickly drove to Fromme to get more miles on this test bike. The climbing on the Bronson, once again was great. I was able to quickly climb all gravel areas to arrive at the top of Seventh Secret once again in record time. The head angle and light carbon frame definitely helped me tackle this climb with ease. Mildly fatigued, I descended down Seventh Secret. Again, this wasn’t an entirely comfortable ride as I just didn’t feel confident with my forced body position on the descents (I can’t remember the last time that the rear tire touched my ass so many times). Now feeling slightly fatigued and less confident, I decided to ride Pipeline rather than Ladies Only to my car. Again, I noticed similar lack of control and confidence on my descent. Overall, I rate the Bronson as a superb climber, and great XC bike with slight limitations on descents. I would recommend this bike for a rider that prefers long XC trails and not too many big hits. For the price point, I believe this entry level Carbon XC bike performed overall very well and is of great value. If someone is considering buying it, the most significant upgrade you could make is to upgrade the brakes (Shimano XT) to 4 piston brakes. This will give you more control on your descents.

2015 Santa Cruz Nomad Carbon C

IMG_20141016_122222

The floor of my car. Please take note of the multiple empty cans of Monster Energy drink…..does advertising work????

After a long night tossing and turning like a child about to receive his first bike, I awoke excited to be riding a $8000 Carbon bike. I spent the previous night, stuffing myself with Thanksgiving turkey, cheap wine and Caribou beer(I can’t afford good alcohol saving for the Carbon fund) and  awakened to a pounding headache and hangover which immediately went away when I went to my garage and saw the black Santa Cruz beauty. I quickly ate breakfast drank a pre-ride Monster energy drink and contemplated whether I was just a victim of advertising (Ratboy drives a Santa Cruz and is sponsored by Monster) while driving to the Shore. I felt immediately curious to see the climbing capability of the Nomad.  With a 65 degree head angle, I admit that I was a bit skeptical about the climbing capabilities of this bike. My initial impression was of feeling pleasantly surprised as I was able to confidently and speedily climb not too different from the Bronson (although I do admit the geometry of the Bronson left me feeling more capable on climbs). I became fatigued into my XC trails at Hyannis and discovered that this was probably due to the limitations of the chain ring (the crankset includes a 32 tooth front ring and the cassette is a 11-speed 10-42). I was able to cover all the XC trails, however I started feeling a bit of strain on my legs due to the 32T front ring. Once I arrived at Old Buck for the climb, I was able to climb, however, I had to stop on 3 different occasions as the 32 tooth front ring was limiting me. Once I arrived at Dale’s Trail, I was excited for my descent and my anticipation was rewarded without any disappointments. The geometry of the bike left me with a feeling of control so that I was able to confidently and aggressively tackle the steep technical descents while maintaining excellent body structure (I wasn’t having to lean too far back). I was immediately impressed with the combination of the RockShox Pike fork and Monarch Debonair rear shock. The suspension accurately and confidently ate up all the technical terrain that Dale’s trail had to offer, I felt a sense of control with this bike that I never felt before. I quickly shredded through the XC trails Forever After and arrived back at my car in record time (1 hour and 30 minutes for the entire climb and descent with a few breaks in between). I then grabbed some lunch and drove to Burke Mountain. During this period of time, it started raining heavier but I was excited to test the bike on a mountain with more manmade drops and more rooty and loamy terrain. I wasn’t disappointed, on my first descent (Trail: Garbage), I was surprised at the jumping ability of this bike. The light carbon frame propelled me in the air with little effort and I felt that this bike was extremely playful for its weight capacity.  I felt in control fully while jumping and due to the confidence I felt, I arrived with more speed and was able to achieve greater airtime and subsequent adrenaline release with each jump. I felt this bike performed well beyond my expectations, I just felt so naturally confident on this bike.  The only change I would make is changing to a 30 tooth front ring to ease pedaling requirements.

Choosing between the Bronson and Nomad

A tough decision as no bike as of yet can handle all terrain.  When choosing between the 2 bikes, the rider needs to evaluate his preference of riding.  Ask yourself what style of riding do you prefer?  Do you prefer long rooty technical climbs or do you prefer adrenaline rushed downhill descents?  In practical terms relating to B.C. riding, ask yourself do you prefer the challenging climbs along Bridle Path and Comfortably Numb or do you more prefer the adrenaline rush involved with the descents of trails such as Gargamel in Whistler and Boogieman on the Shore?  The Bronson caters to the trail rider preferring climbing with moderate descents while the Nomad is marketed as a mini DH bike, it will cater to the rider that doesn’t mind a long enduro climb to be rewarded with his descent.  The Nomad climbs very efficiently and will be more suited to the rider that doesn’t mind the occasional 1000 meter climb to get to his descent.

CARBON…

What is my verdict?  I’ve observed that the mountain bike community is very divided about everything (ex…brands, components, cost) and very strongly opinionated.  This is my opinion and what I feel after riding carbon fiber bicycles for the first time.  I felt great power delivery and control coupled with a reduction in harshness and vibration, this I definitely didn’t feel from my alloy bike experiences in the past.  Basically, I felt that I was able to push my limits further and that I would progress more rapidly on a carbon fiber mountain bike.  Yes…the cost is more, much more but if I am motivated to ride more often and in particular ride XC more often benefitting my overall cardiovascular health…is the cost really that relevant??  I mean as a health professional,I preach daily that the benefits of good health has no monetary value!

IMG_20141014_160956 IMG_20141014_161142 IMG_20141014_161102

As a community pharmacist, I have seen my share of drug addictions, however, I never predicted addiction would follow me! As you can see from my possessed eyes in the above photos, I have been plagued by the Carbon bug…

About the Author: Jazz Dhiman, aka “The Biking Buddha” is a pharmacist and biking enthusiast born, raised and currently living in Vancouver, BC. He uses mountain biking to escape to the North Shore mountains to avoid seeing his beloved city being taken over by wealthy foreign investment, he is letting other Lulu Lemon wearing yoga matted organic Vancouverites observe this destruction.

Follow me on this site, I will update regularly all my testing of bikes and accessories (lights, clothes, etc…) as well as provide my opinion on regular bike topics.

I also want to hear your opinion, please respond to this post and I will respond to your comments.

For other articles by this author, click below:

Night riding, testing 1500 versus 3000 lumens:

https://thebikingbuddah.wordpress.com/2014/10/30/night-riding-how-many-lumens-do-you-really-need-testing-1500-versus-3000-lumens/

Devinci Spartan, test ride:

https://thebikingbuddah.wordpress.com/2014/10/20/devinci-spartan-test-ride-enduro-craze/

Sugoi RSX Neoshell jacket review:

https://thebikingbuddah.wordpress.com/2014/11/26/sugoi-rsx-neoshell-jacket-windcoldrain/

AND……if you still want more, check out my VIDEO home page below:

http://vimeo.com/user24675081

norco-bike 10665780_10152697480449162_3933871133943560274_n santa cruz

On a final note, I would like to express a special thanks to Paul, at Steed Cycles in West Vancouver for allowing me to demo the Santa Cruz bikes.

unnamed

A fat thumbs up and Thank You to Steed Cycles in West Vancouver for allowing me to demo the Santa Cruz fleet.